A step by step guide
At a glance !!
-
1. A low end hardware with SSD
-
2. A registered DNS (paid or free option)
-
3. Home Router Firewall ports
-
15. Configure Media
With the average smart phone user taking 7000+ (1500 by conservative estimates) photos each year, the need to manage those large number of pictures (and videos!) is more than ever. There are options by various service providers (amazon photos, google photos, etc.) to store and share that media, but if you are like me then you would want to keep your media on a privately and sovereign privately hosted cloud that you can manage, control. Neither your privacy, nor the quality of your photos/videos should be a comprising you should need to make. At the same time, access to your media should be super-secure, and also backed up so your don't lose it if your private cloud has a hiccup.
Whats different here?
When it comes to setting that up, there are quite a few blogs available already that offer setting up of media server, but none that I came across that could meet the security, sovereignty, and quality level I had wanted to use. Besides, they would often offer a half-baked solution instead of a full and comprehensive star-to-finish set of steps
Hence, I opted to develop my own set of steps and then document those steps in the form of this blog so that it offers a step by step step by step guide to others.
Lets set to goals
Media Server Application
The media server here will be setup such that:
- Not resource hungry – able to run on a low end server
- You are able to access it from anywhere, using credentials; on your (smart) TV, phone, or anywhere through the internet etc.
- Photos can be played back as a slideshow and are easily searchable
- You are able to share specific content with different user accounts (separate for each friend, family member etc.)
- You, and your friends/family are able to upload media to your server
Resource Security:
To ensure server is properly restricted:
- I have opted to run it in rootless Podman container, without any ability to initiate internet connection
- Restict its ability to reach other devices within your private network
- Limit the CPU/Memory it has access to (again, thanks to use of Podman containers)
Access Security:
The server implementation shall ensuring that security is not overlooked. Even though the media server application you may choose is trustworthy and open-source it should be restrained and restricted as much as possible to prevent against any mischievous code that may exist in it. At the same time, access to it should be restricted , encrypted and robust.
To secure access to the media server, the blog walks you through the following security measures:
- Hidden behind a time-and-community-hardened http/s server (such as Apache or Nginx)
- Using HTTPS to encrypt traffic
- Authenticate using credentials and 2FA with OTP
- Use non standard ports to further mask out the server's existence
- Use of Linux Firewall to allow only required ports to be accessible
- At the host's level, use linux security features such as SELinux
Requirements
Hardware Requirement
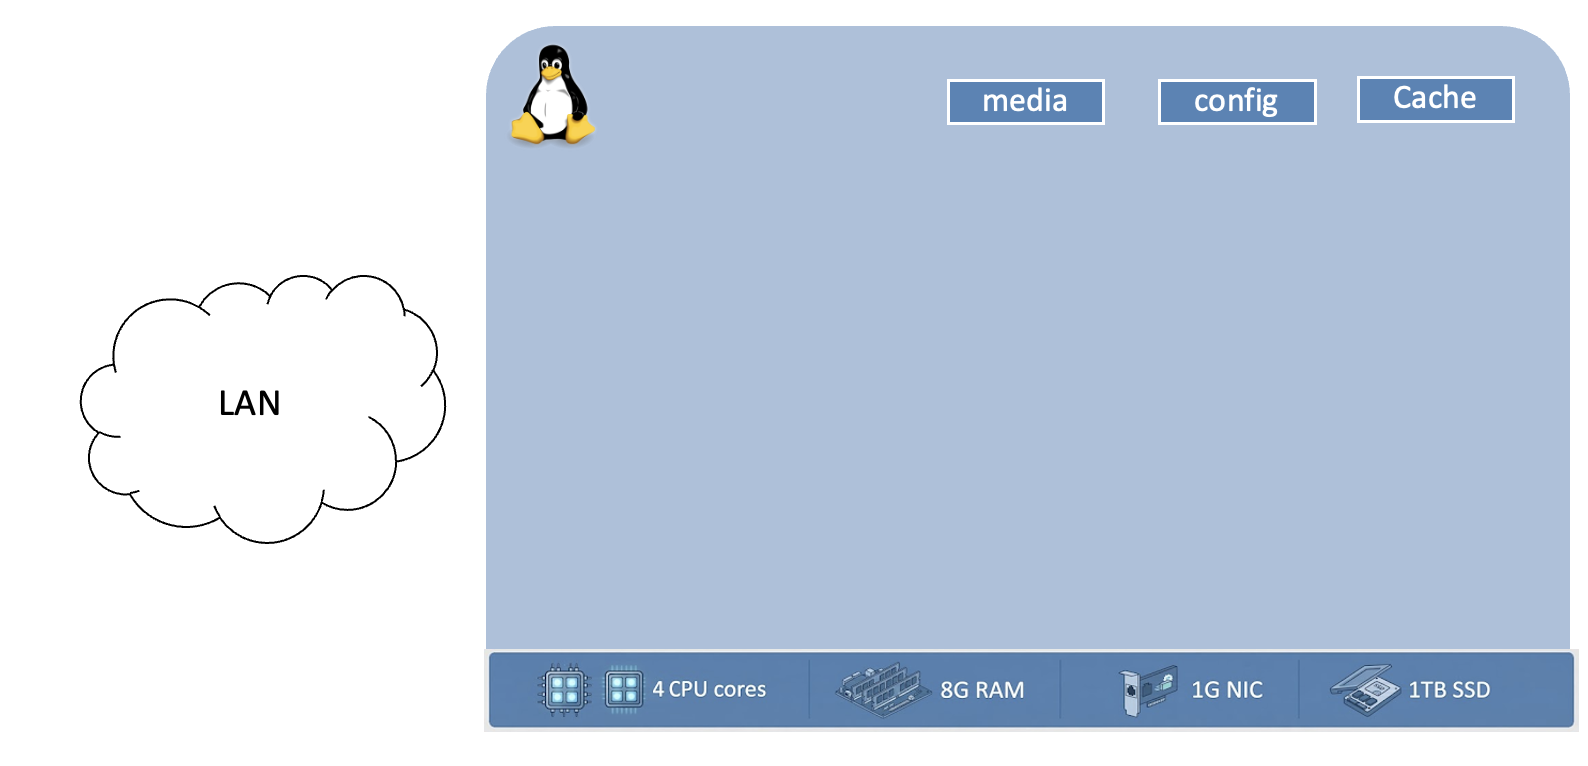
You don't need a high-end server for this. In fact, an old PC that you may have put aside to be recycled may serve this purpose quite well. I have found it to work perfectly well on a 4 core (dual threaded) Intel i7-720QM processor from 2009! The system had 8G of RAM and a standard NIC. If using an old PC, the one component you would want to upgrade will be a SSD drive, and given that you will be storing a lot of photos/videos on it, it should preferably be 1TB or higher. A single disk is sufficient, and you don't need RAID; you can use a cloud disk for backup purposes. So in short, here is what you require in terms of hardware:
| CPU | Memory | Disk | NIC | ||||
|---|---|---|---|---|---|---|---|
| A decent 4 Core (or more) processor | 8G recommended | SSD, preferably 1TB or more | Standard 1G interface (or higher) | ||||
| sub-directory | purpose |
|---|---|
| media | this is where you will store all your photos and videos |
| jellyfin/config | this is where JellyFin will store its configuration data |
| jellyfin/cache | this is used by JellyFin for caching |
At this point, our setup looks like the following:
Create restricted network
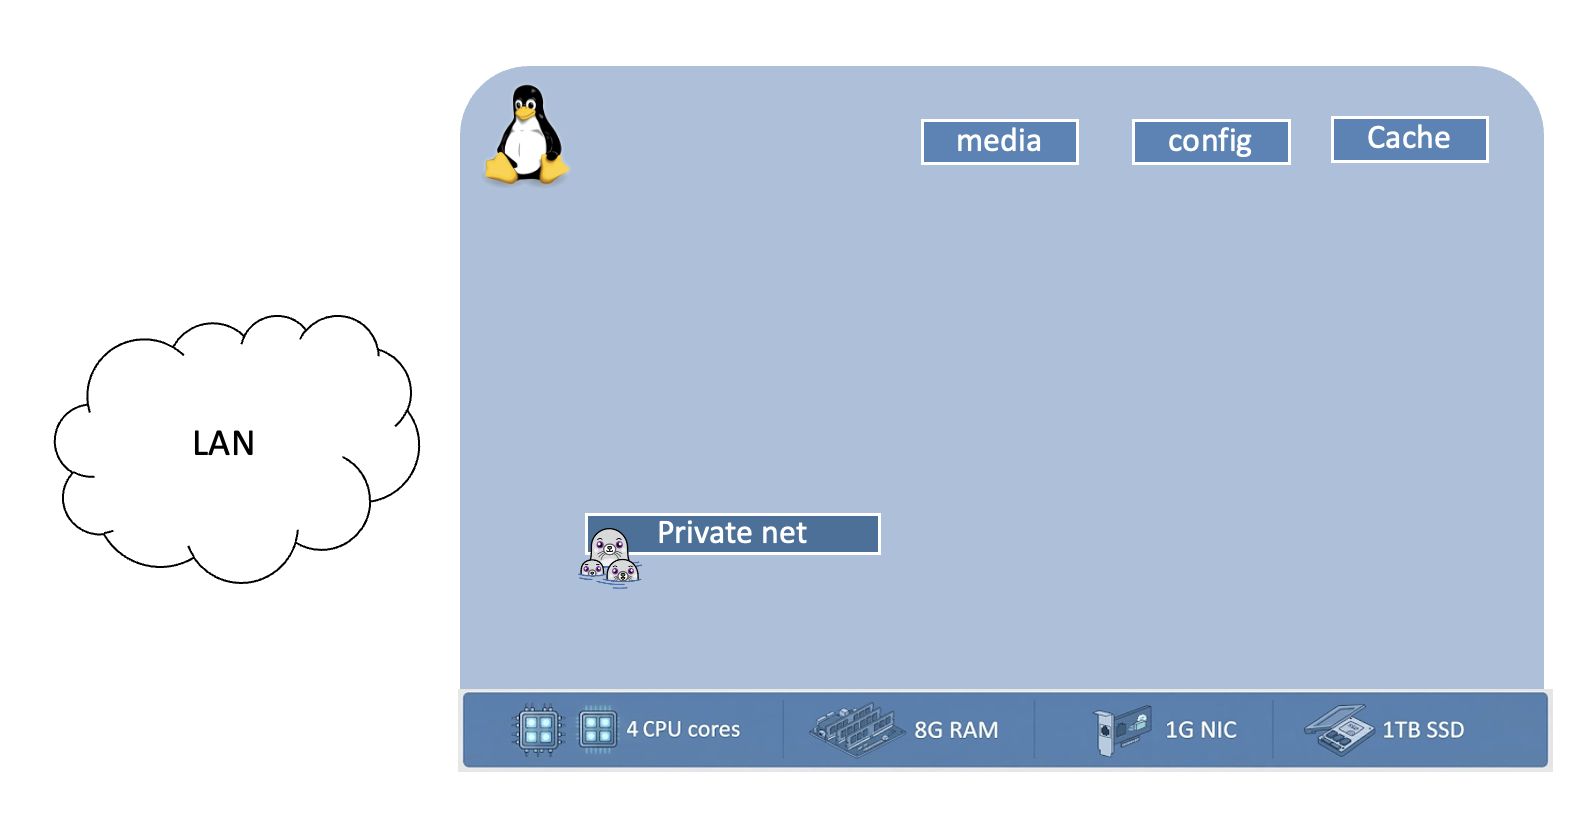
To meet the security requirements, however, I will choose to install Jellyfind in a container instead of running it directly on the host machine. To isolate it, I will define its own container network. To ensure that the container always runs when the system is rebooted, its best to define it as a user-leverl systemd servrice. Similarly, the network definition can also be defined as a systemd service.Use the following command to define the restricted container network, calling it:
mkdir –p ~/.config/containers/systemd/
cat << EOF > ~/.config/containers/systemd/media.network
[Unit]
Description=Network for Media

[Network]
NetworkName=media_net
NetworkDeleteOnStop=false
Internal=true
DisableDNS=false
EOF
This configuration enforces the network to be internal, enables local DNS lookup for the containers attached to this network. For details of the parameters used, refer to this Podman documentation
What we have now is this:
Create container for media server
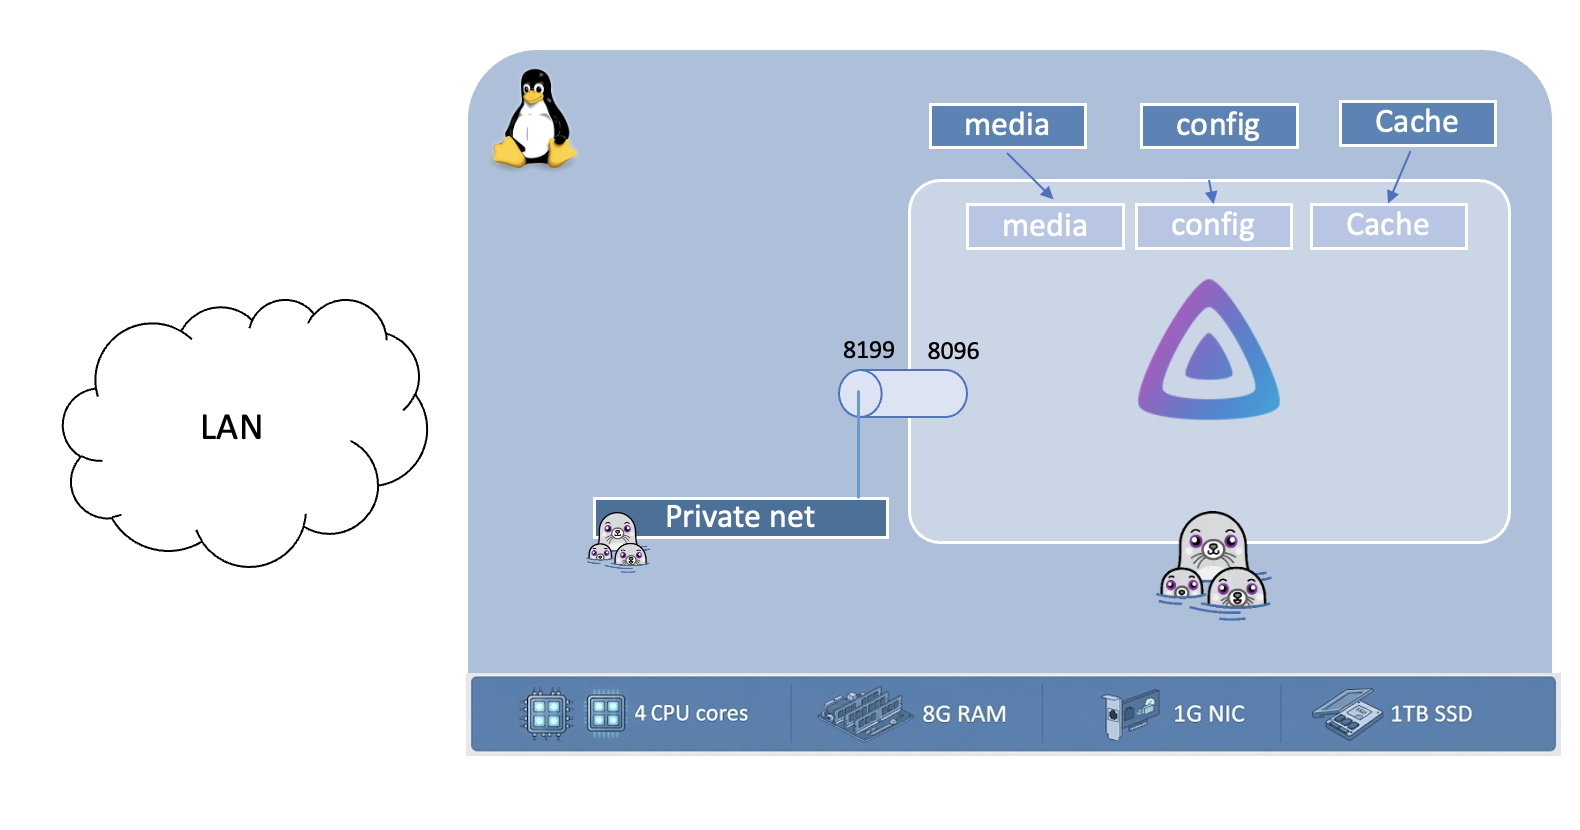
Now lets define the podman service unit to run Jellyfin as a container utilizing the above defined network:
cat << EOF > ~/.config/containers/systemd/jellyfin.container
[Unit]
Description=Jellyfin Latest
Wants=network-online.target
After=network-online.target

[Container]
ContainerName=jellyfin
Image=docker.io/jellyfin/jellyfin:latest
Network=media.network

# Port publishing
PublishPort=127.0.0.1:8199:8096

# Volume
Volume=/home/myuser/jellyfin/cache:/cache:Z
Volume=/home/myuser/jellyfin/config:/config:Z
Volume=/home/myuser/media:/media:z

[Service]
Restart=always
RestartSec=5

[Install]
WantedBy=default.target
EOF
For details of the parameters used, refer to this document. In a nutshell, this container uses the Jellyfin latest docker image, uses the isolated network, maps the container to listen to port 8199
Our server can now be visualized as this:
Run the media server as a service
The files created here, referred to as "Quadlet Files” now need to be enabled to run by systemd service. To achieve that, use the following set of commands:
systemctl --user daemon-reload
loginctl enable-linger myuser
systemctl --user start media-network
systemctl --user start jellyfin
You can verify that the service is successfully running by using the followings:
$ systemctl --user status jellyfin.service
● jellyfin.service - Jellyfin Latest
     Loaded: loaded (/home/myuser/.config/containers/systemd/jellyfin.container; generated)
     Active: active (running) since Wed 2026-09-09 17:43:37 EDT; 6 days ago
   Main PID: 819955 (conmon)
<>
Or check the podman container running using "podman ps" command
Enabling External Access to the Media Server
Configure HTTP access
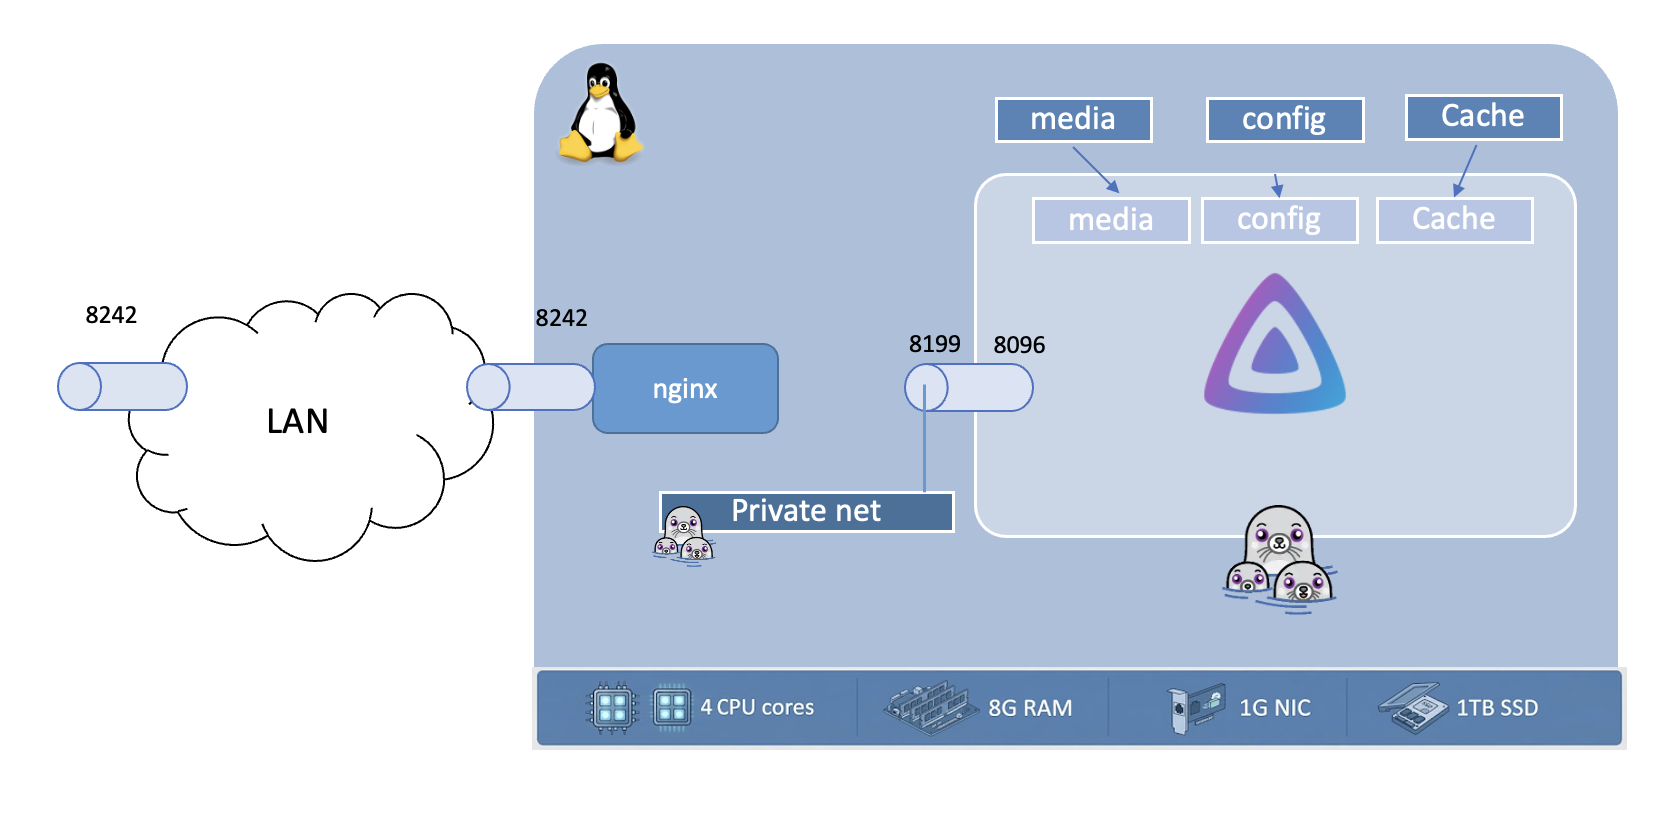
Your server is up and ready at this point, but its not yet accsssible from outside your host. To make that possible, lets run a web server with reverse proxy to this container. This way, the only way to access this container and its GUI will be through the webserver; which will then enforce encryption as well as roboustness
I have chosen nginx for this purpose. Default installation was already done in previous step, lets go ahead and configure it for our use
Edit the file /etc/nginx/nginx.conf , and comment out all the sections in the "server" section. For example:
#    server {
#        listen       80;
#        listen       [::]:80;
#        server_name  _;
#        root         /usr/share/nginx/html;
#
#        # Load configuration files for the default server block.
#        include /etc/nginx/default.d/*.conf;
#
#        error_page 404 /404.html;
#        location = /404.html {
#        }
#
#        error_page 500 502 503 504 /50x.html;
#        location = /50x.html {
#        }
#    }
Now create your own configuration file for the virtual host, using the example below:
sudo cat << EOF > /etc/nginx/conf.d/media.conf

server {
    ## for jellyfin
    listen 8242;
    location / {
        proxy_pass http://127.0.0.1:8199/;
        proxy_set_header Host $host;
        proxy_set_header X-Real-IP $remote_addr;
        proxy_set_header X-Forwarded-For $proxy_add_x_forwarded_for;
        proxy_set_header X-Forwarded-Proto $scheme;
    }
}
EOF
Firewall and SELinux
As a final step, lets ensure that firewalld (running by default) and SELinux (enabled by default) allow access to the http (and HTTPS ports as well, in the future).
For the firewall, use the following set of commands:
sudo firewall-cmd --add-port=8242/tcp --add-port=8242/udp --add-port=8343/tcp --add-port=8343/udp --permanent
sudo firewall-cmd --reload
For SELinux, use the followings:
sudo semanage port -a -t http_port_t -p tcp 8242
sudo semanage port -a -t http_port_t -p tcp 8343
sudo setsebool -P httpd_enable_homedirs on
sudo setsebool -P httpd_can_network_connect 1
Starting web server
Lets start the nginx server:
sudo systemctl enable --now nginx
Ensure that its running using the following:
systemctl status nginx
Output should show "active (running)"
So now we have the following setup:
Secure External access using HTTPS
Lets now enable https. We can use letsencrypt, a freely avaialble service, for that. However, before we generate certificates, we need to ensure that domain name is set up and access to the server has been properly configured.
Setting up the domain and home internet access
I will assume that you are using your own domain name, and have already pointed it towards your home IP address. At this point, you should also open up the port (8242 and 8343 in our case) on the home router's firewall, and map these ports to the respective ports on your media server's IP address
Generating Certificate
To use letsencrypt to generate a signed certicate, the tool used is called "Certbot", whcih is installed using "snapd". snapd was previously installed in an earlier stape, but we just need to enable it at this point:
sudo systemctl enable --now snapd.socket
sudo ln -s /var/lib/snapd/snap /snap
# Wait a minute or so for the service to run, and then use the followings:
sleep 60
sudo snap install core; sudo snap refresh core
Finally, install certbot using:
sudo snap install --classic certbot
sudo ln -s /snap/bin/certbot /usr/bin/certbot
Now you can use the certbot command to generate and install the certificates for your domain name:
sudo certbot --nginx -d your.domain.net
Configure Nginx for HTTPS
Certbot would not only create the certificates, but it will also create the required config for it. However, it assumes default https port (443) and as a security measure I would prefer to use a non-standard port. Hence, I will remove the auto created https entry in nginx configuration (you will find it in /etc/nginx/cond.d/media.conf) , and replace it with:
sudo cat << EOF >> /etc/nginx/media.conf
server {
    ## for jellyfin https (external)
    listen 8343 ssl;
    server_name mymedia.mydomain.net;
    ssl_certificate /etc/letsencrypt/live/mymedia.mydomain.net/fullchain.pem;
    ssl_certificate_key /etc/letsencrypt/live/mymedia.mydomain.net/privkey.pem;
    location / {
        proxy_pass http://127.0.0.1:8199/;
        proxy_set_header Host $host;
        proxy_set_header X-Real-IP $remote_addr;
        proxy_set_header X-Forwarded-For $proxy_add_x_forwarded_for;
        proxy_set_header X-Forwarded-Proto $scheme;
    }
}
Restart nginx a final time:
sudo systemctl restart nginx
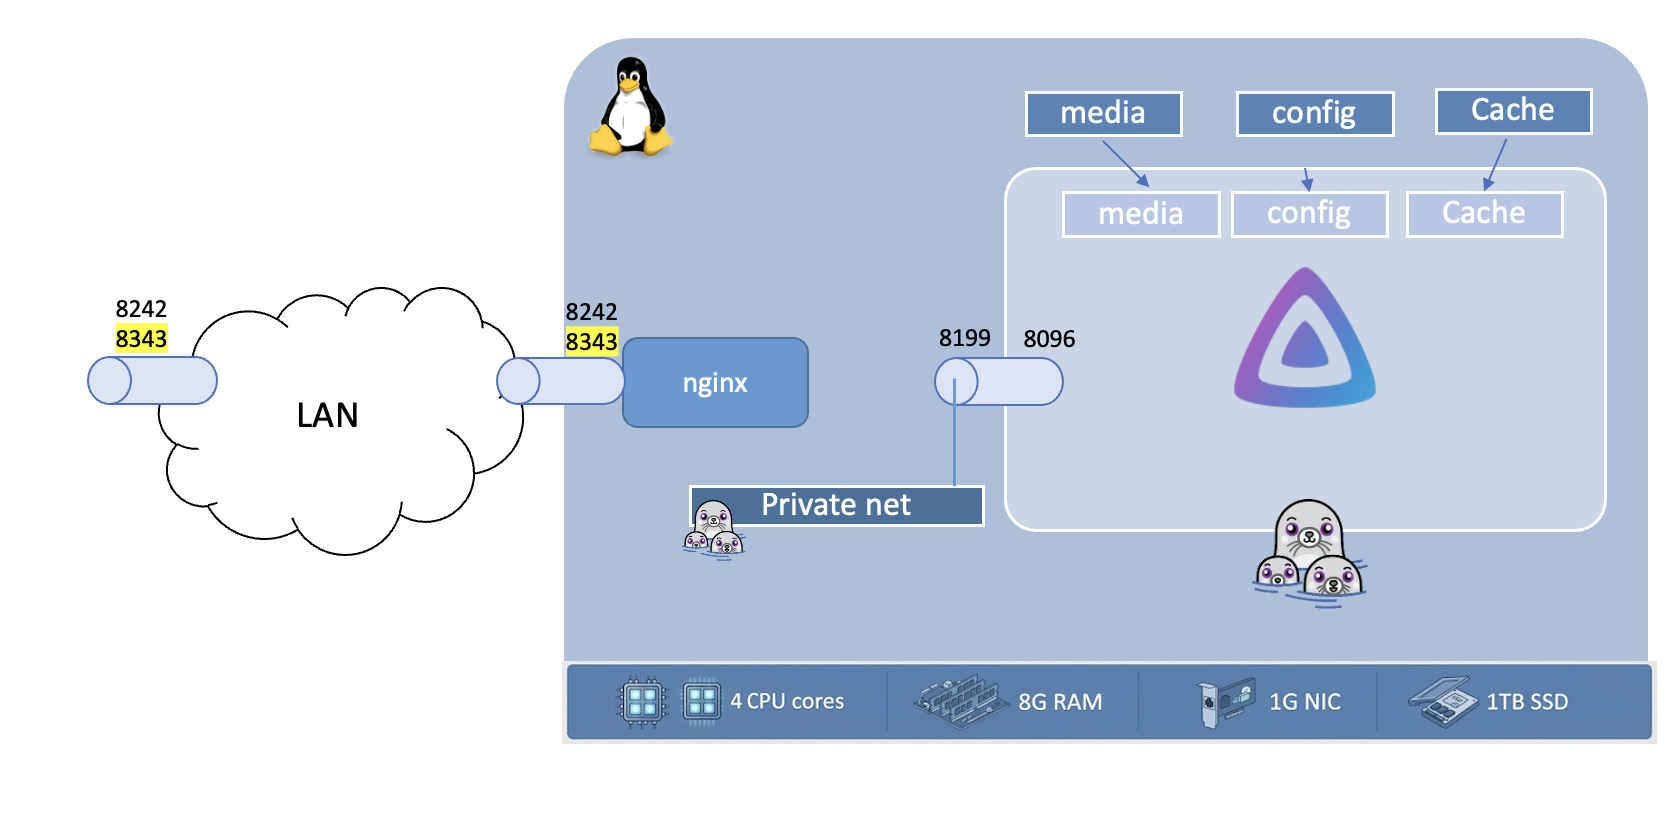
Your media server is now ready and shall be accessible from anywhere remotely. Following is what this final setup looks like
Bringing up & Configuring the server
Accessing the serer for the first time
Now that your media server is ready, you can go ahead and access it. Note that if you are accessing it from your LAN, then access it on the non-https port and use the host's IP address. But if accessing from outside your network, then you should use https and point towards the https port and domain name that you had used
Bring up the server
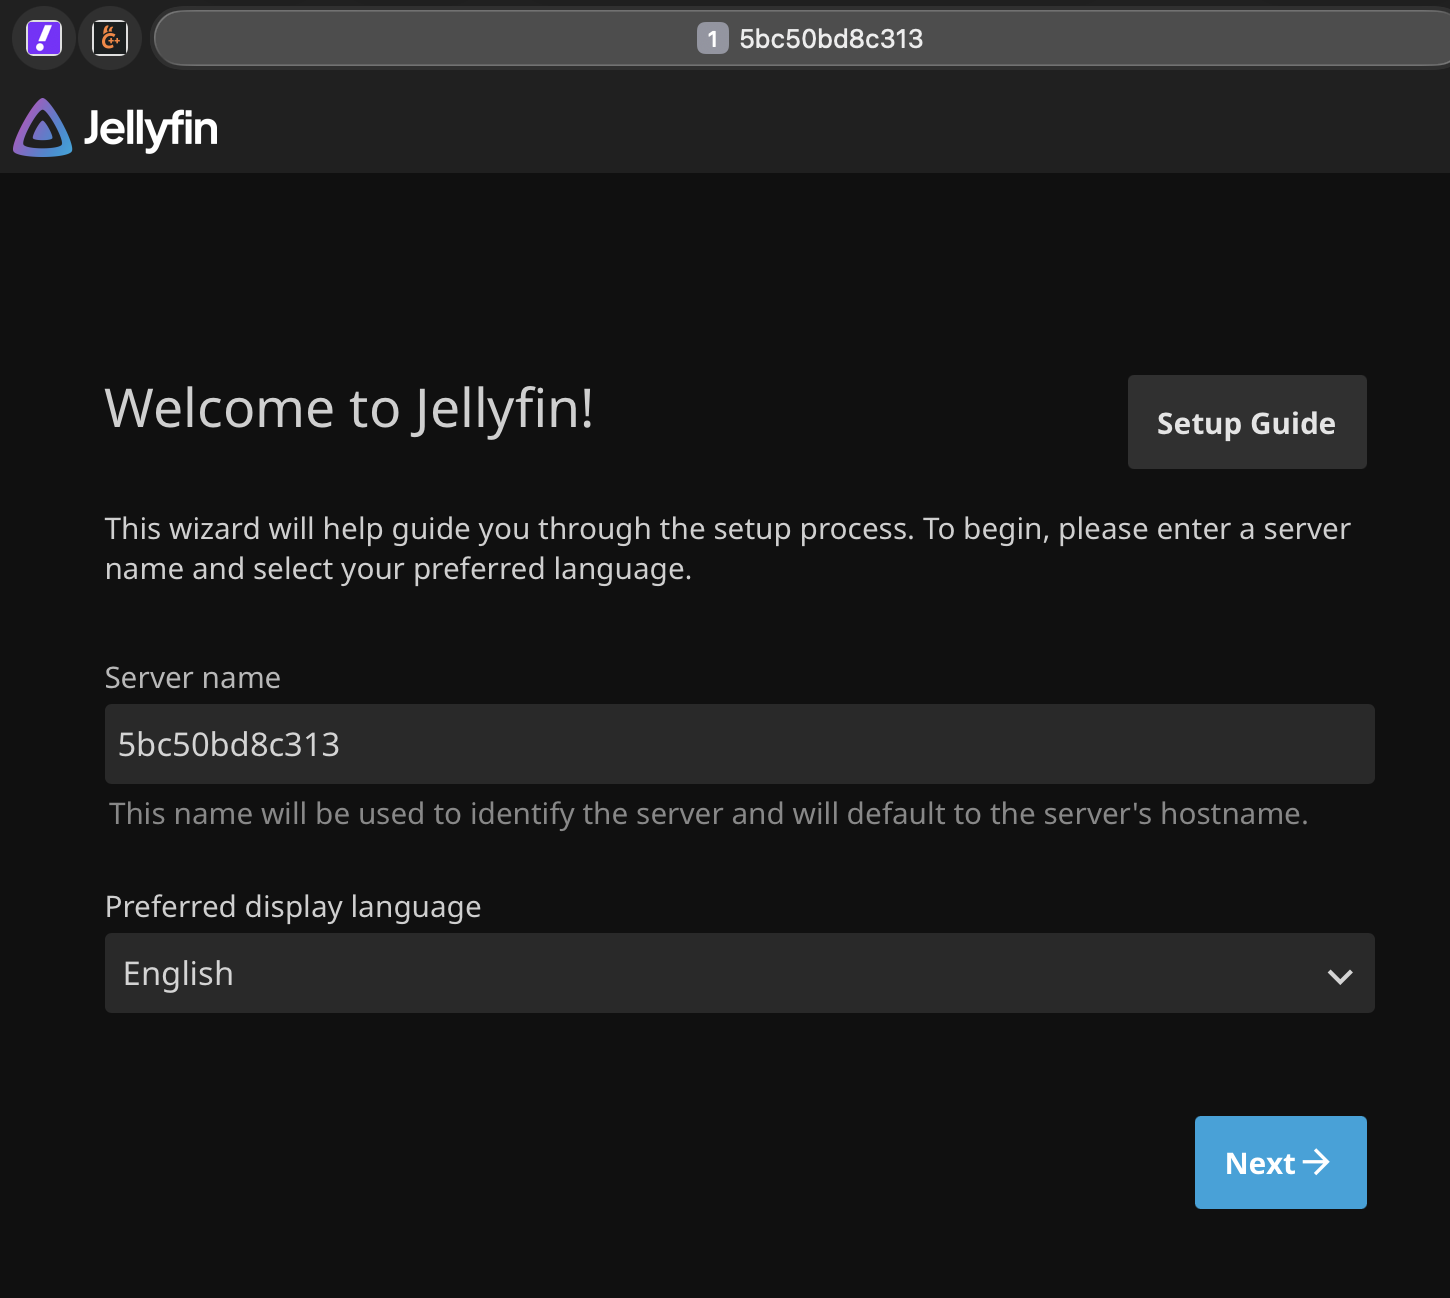
When you reach the server, you are presented with a welcome screen like the following one. Here, you can give your server a preferred name and move to the next screen for the configuration options:
Configure user name
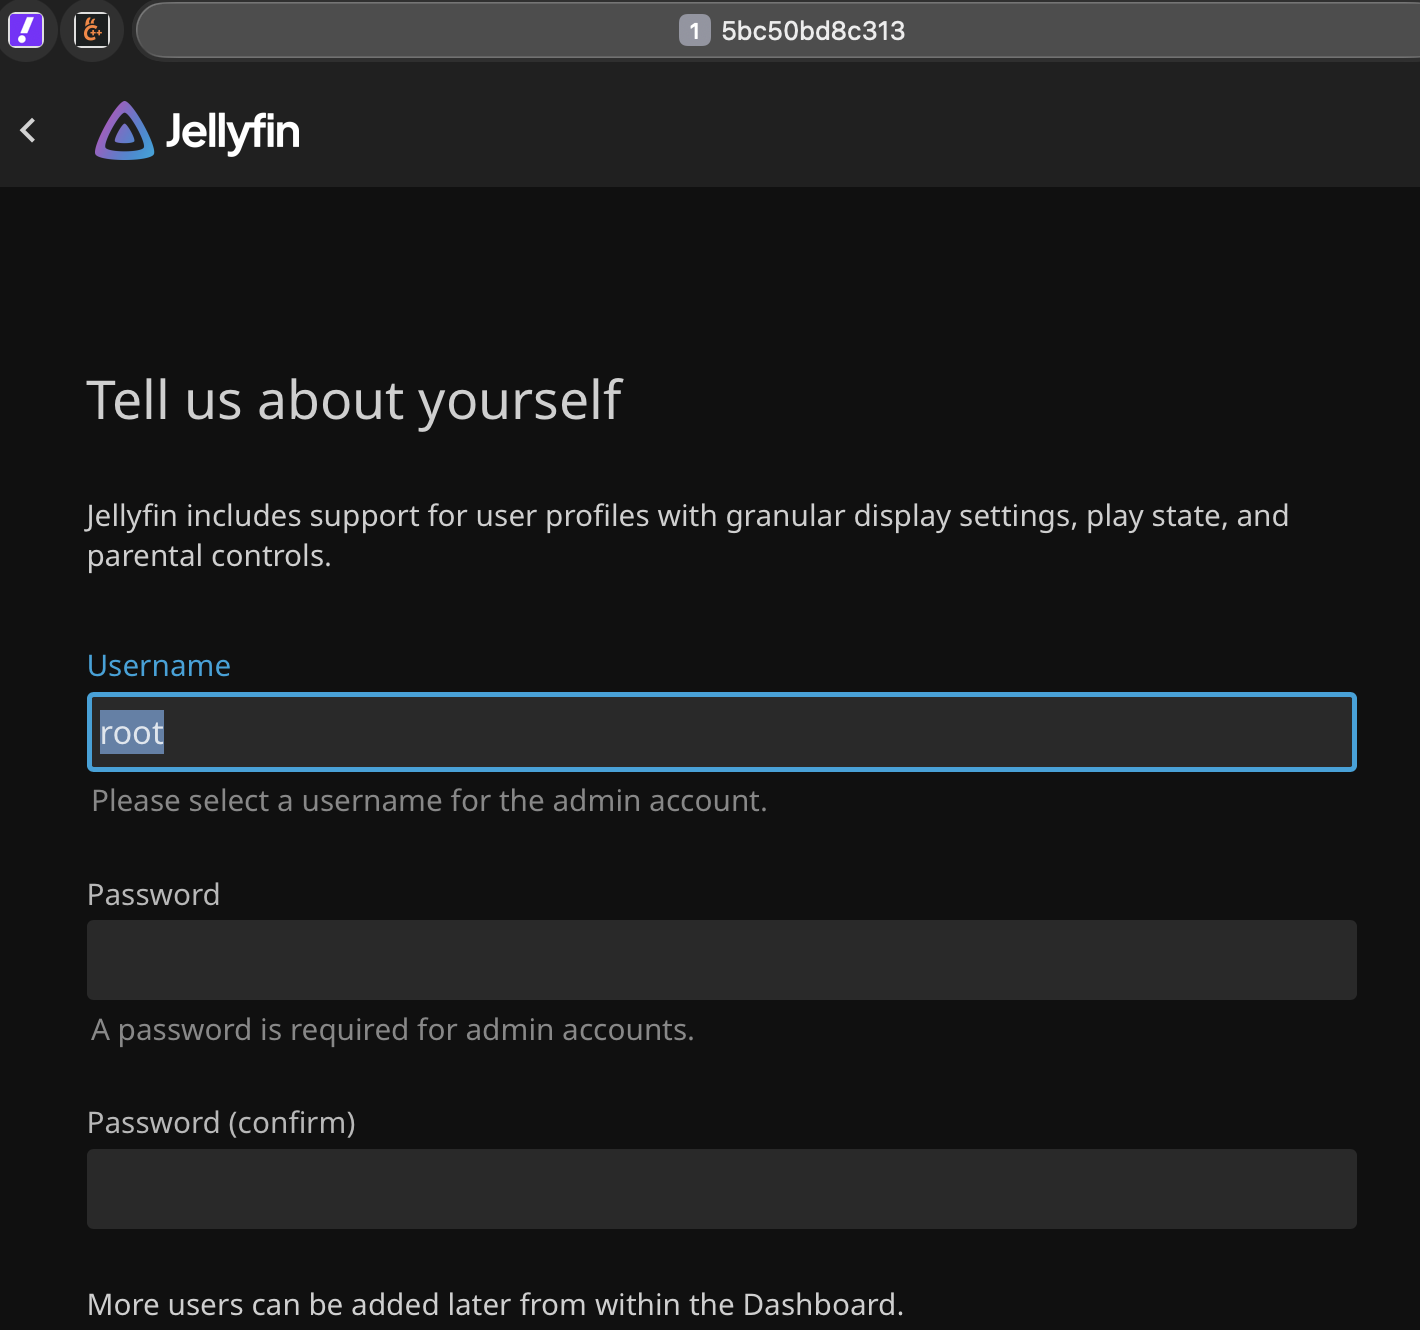
The next configuraiton screen will ask you to configure a username and password to use. This first user will also be an admin user for your server. Choose the password carefully because this media server is exposed to the internet and prone to attacks.
Configure Media
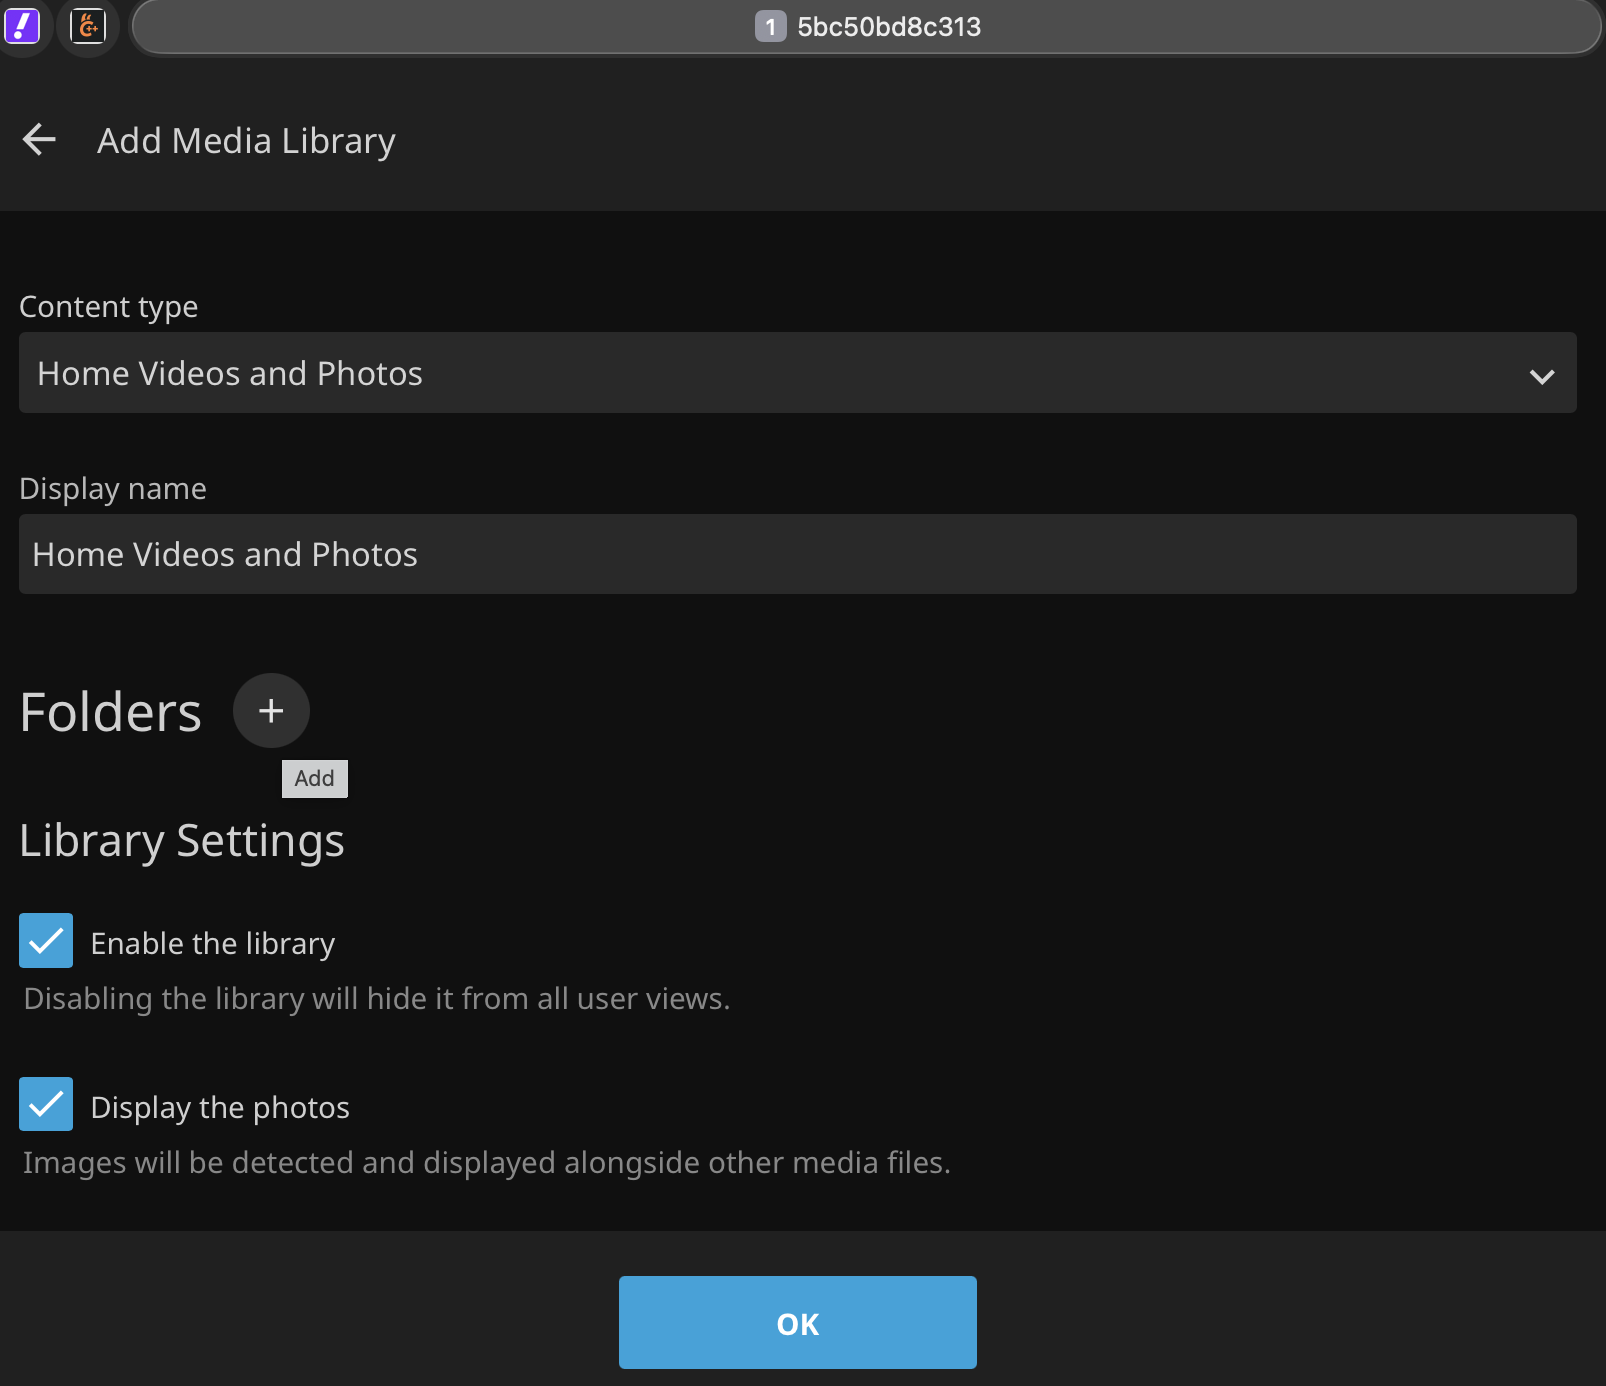
On this next screen, add media location and category. You can select the top level folder that we had configured ("/media") and give it a library name.
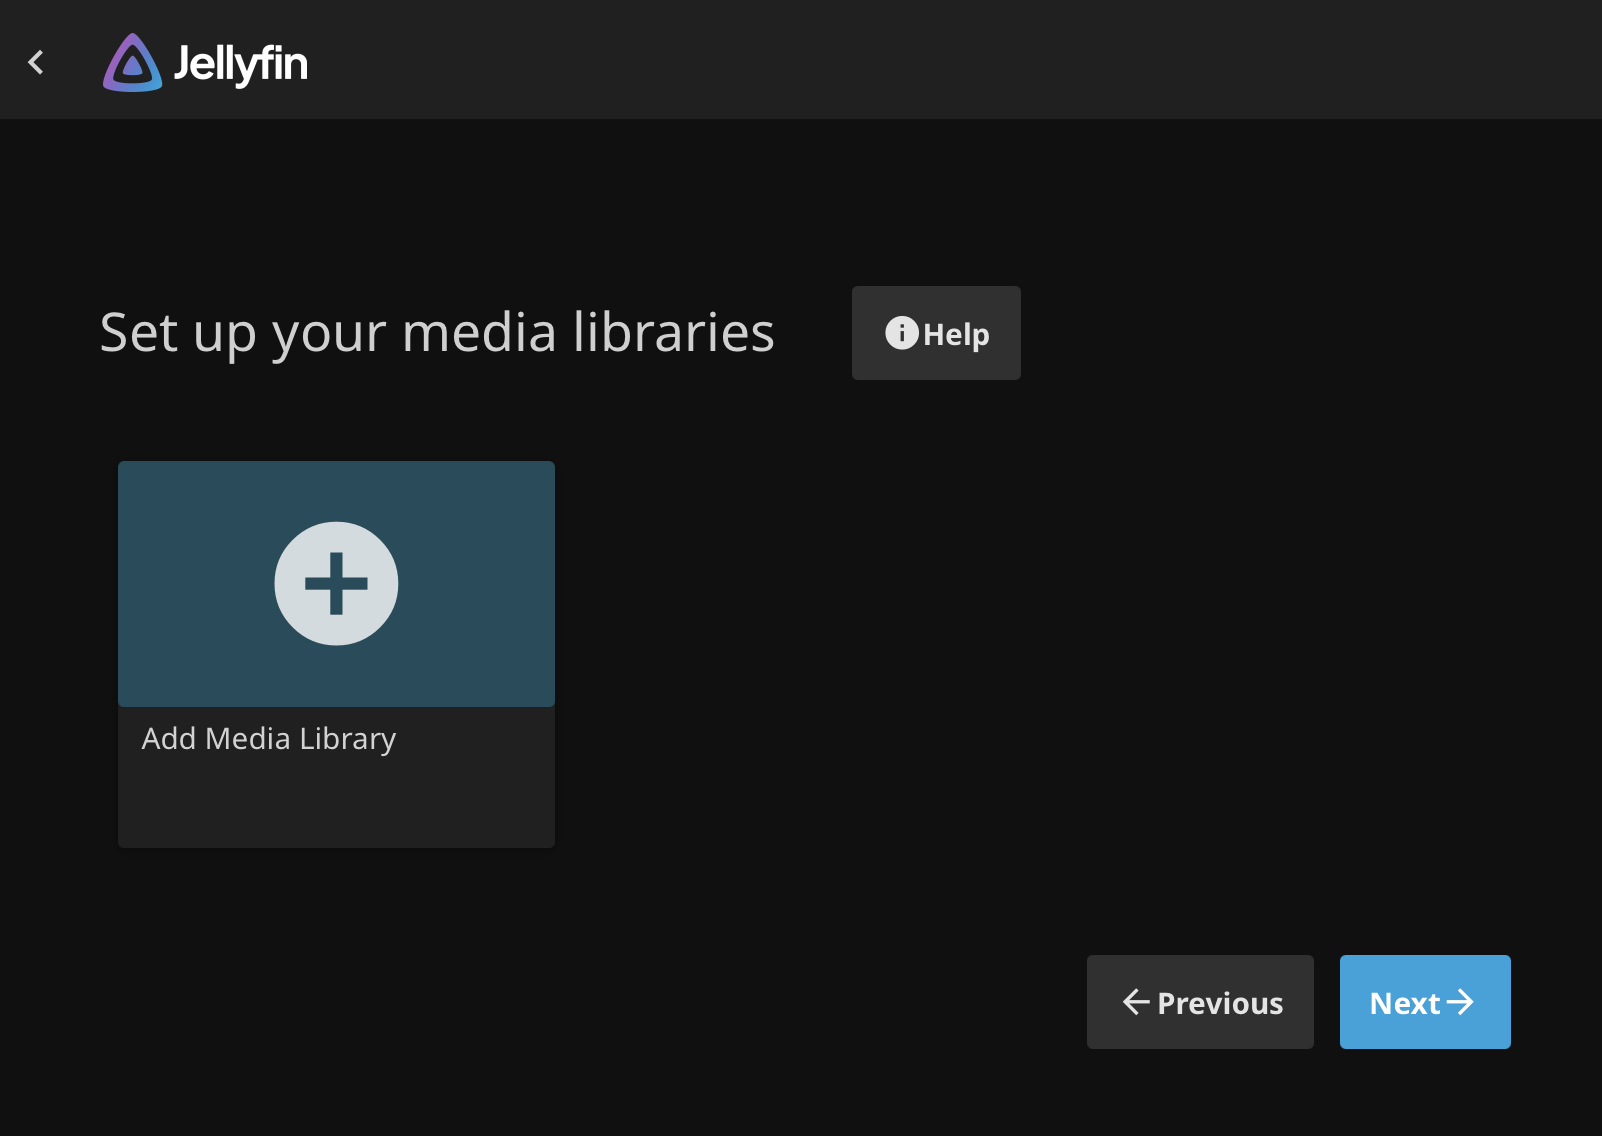
At this point, you can also go ahead and start copying your photos and videos to the ~/media/ directory of your host machine. I will recommend to use different folders for pics/videos from different events, and include the dates in the name of the folder. This will help you search much conveniently. For example, I use something like "2025_01_12_Red_Hat_One_Event" as folder name.
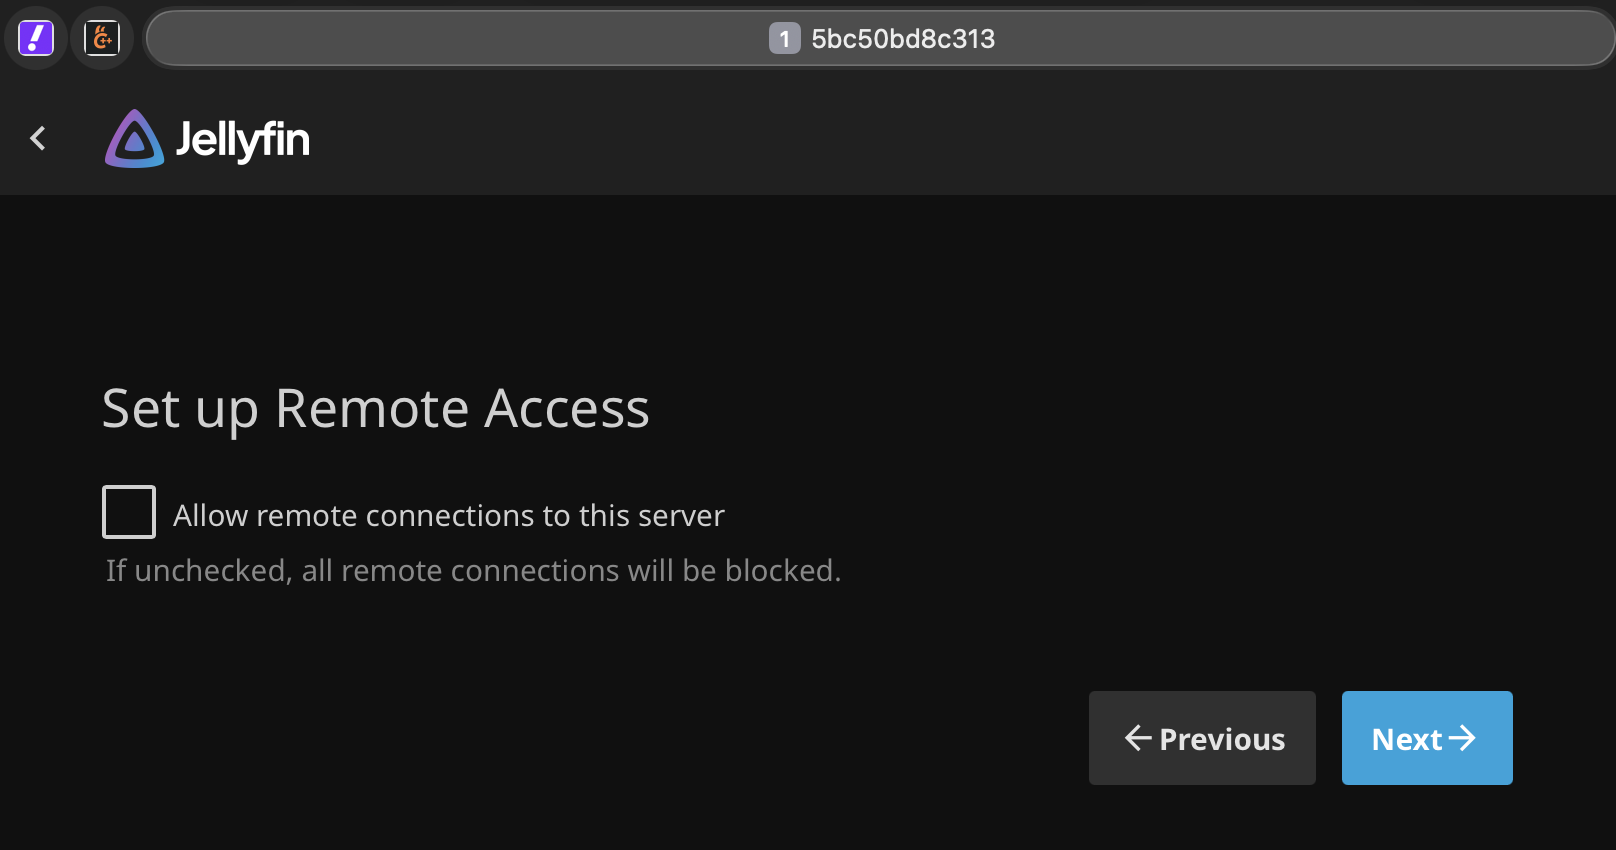
Disable remote access
In the subsequent steps, disable the "remote access" to the jellyfin server. We will still be accessing it remotely, but the server doesn't need to know that, and we woudn't want it to enable any such acess.
Finish the configuration
You are done with the basic configuration at this point. Proceed to Finish
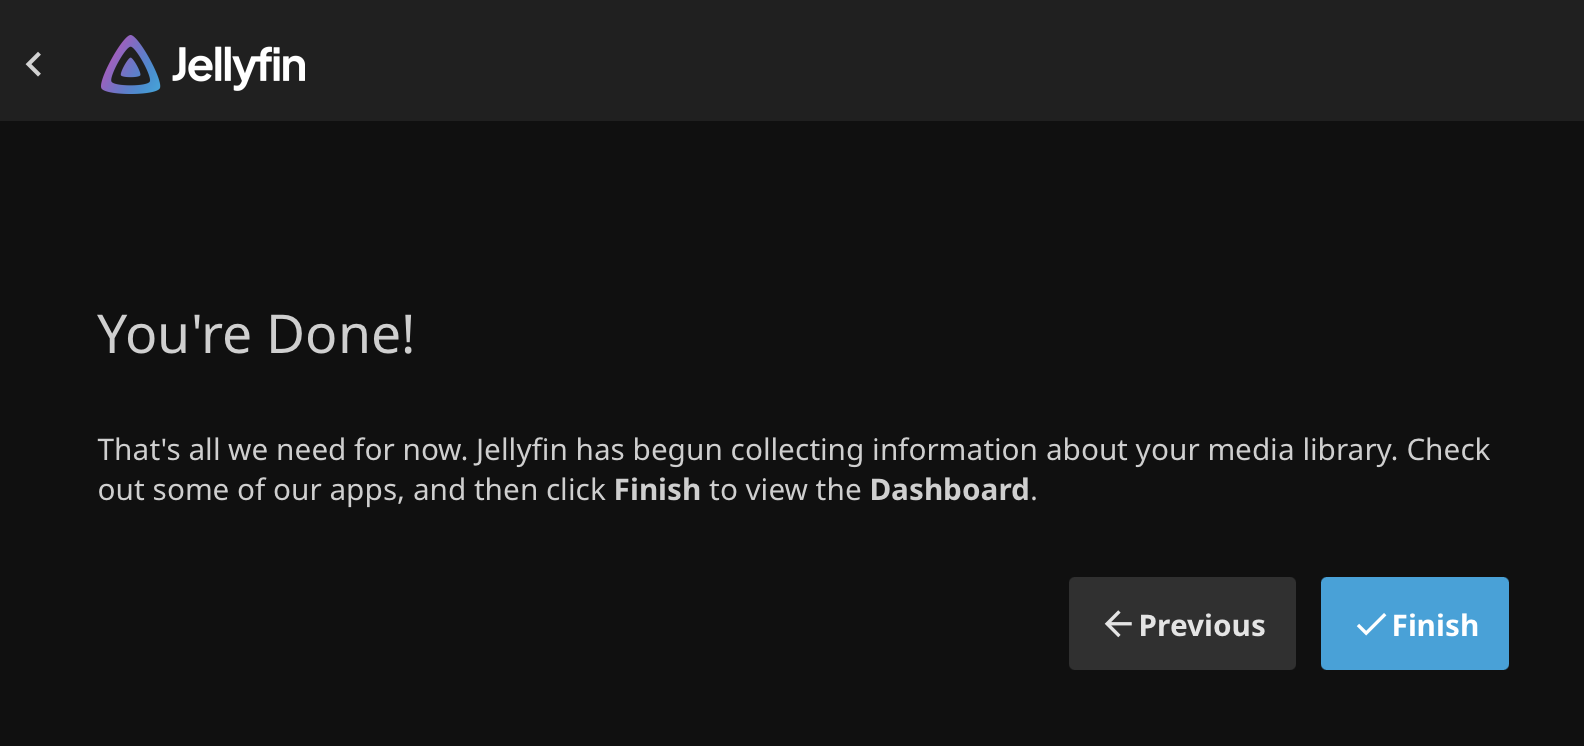
The server will ask you to login again, using your newly created credentials. You can go ahead and view the dashboard and configure the server further if you want, or add more media etc.
You can continue to add more media files in the background. If any recently uploaded content doesn't show up in your library, you can use the "Scan All Libraries" option to import these contents (if not happening automatically already) into Jellyfin's database.
Tip
Securing the media server
About jellyfin Plugins
Jellyfin offers various plugins, and though many of those are focused towards video/movie plauback, there are quite a few that are very meaningful to add to your home server as well.
To see the plugsins you have, or to add new ones, you can use the following sequence of steps to reach the plugins page:
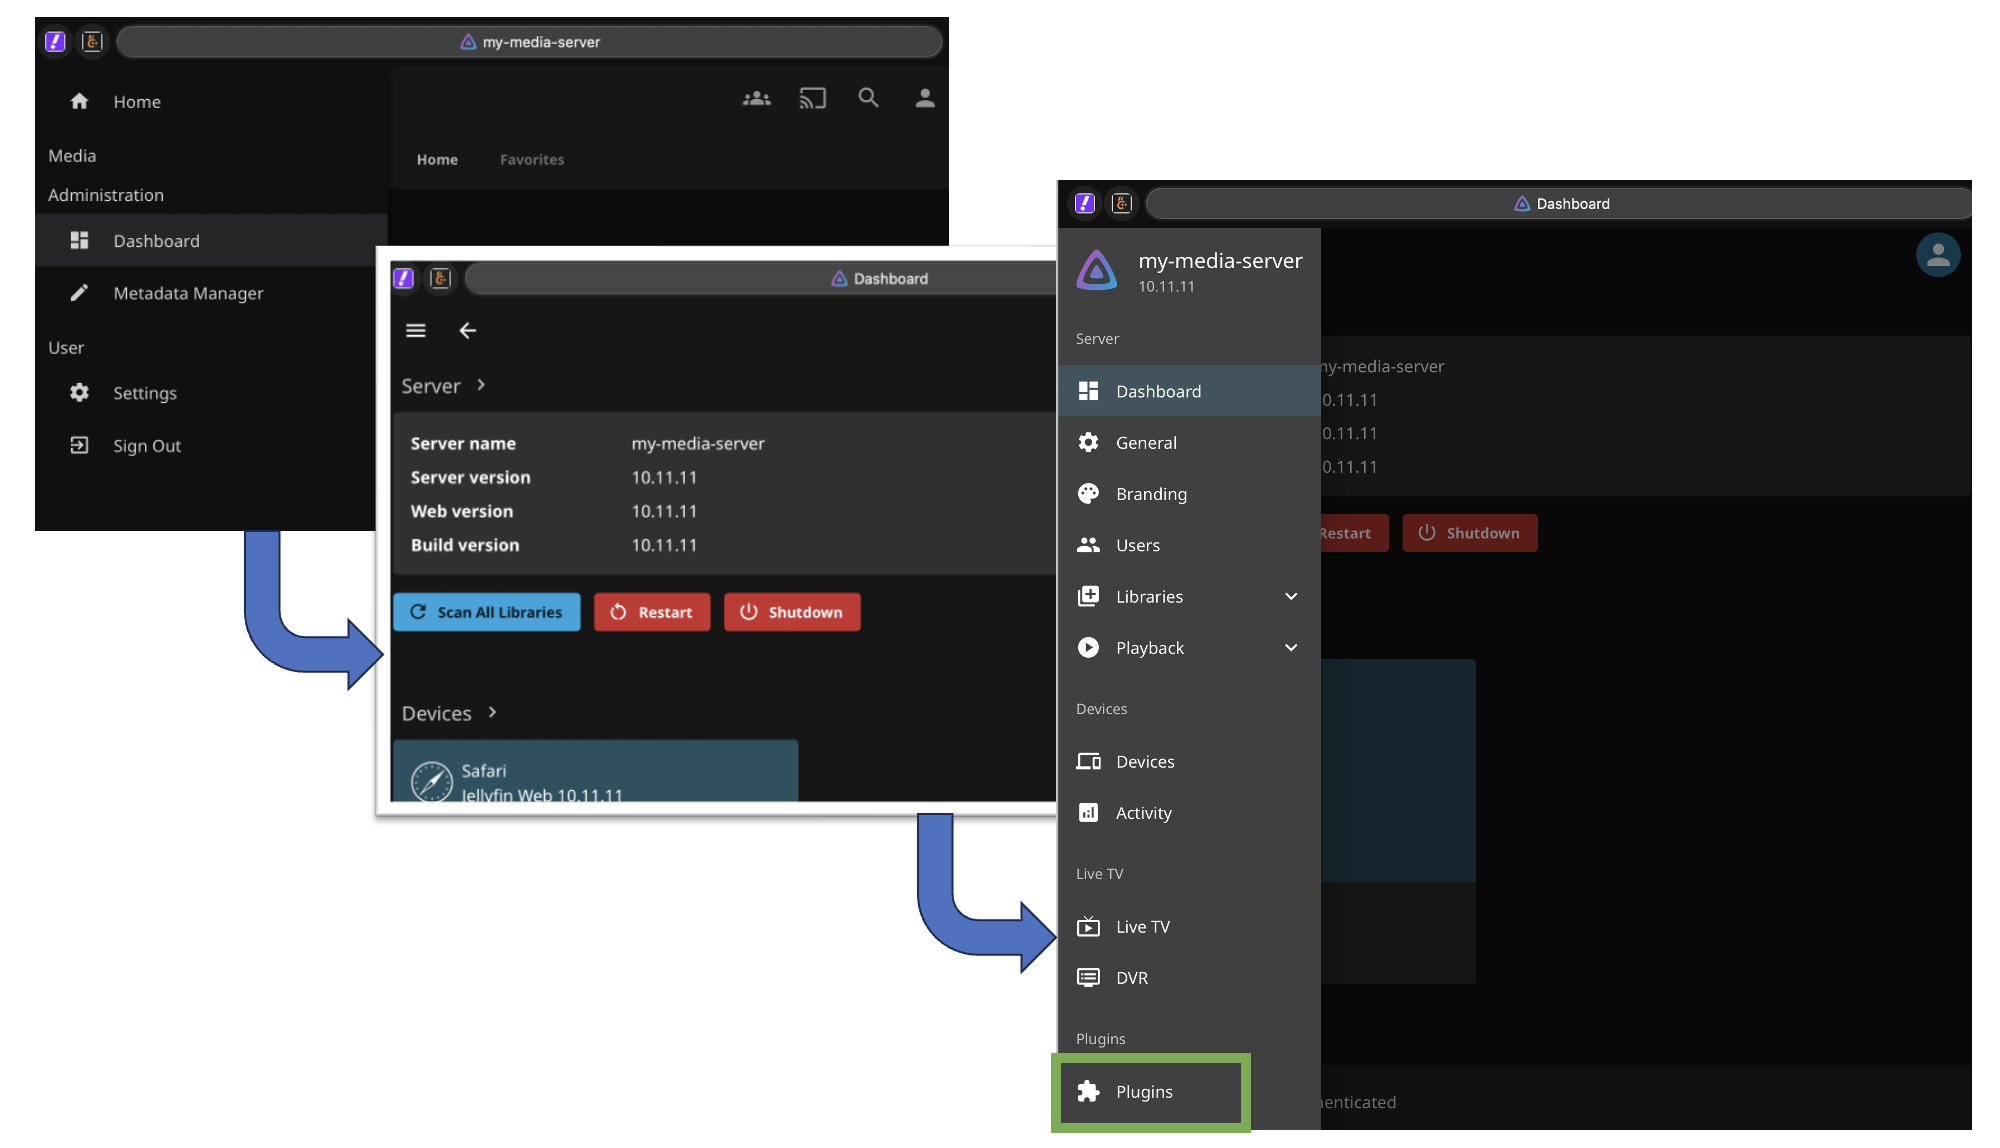
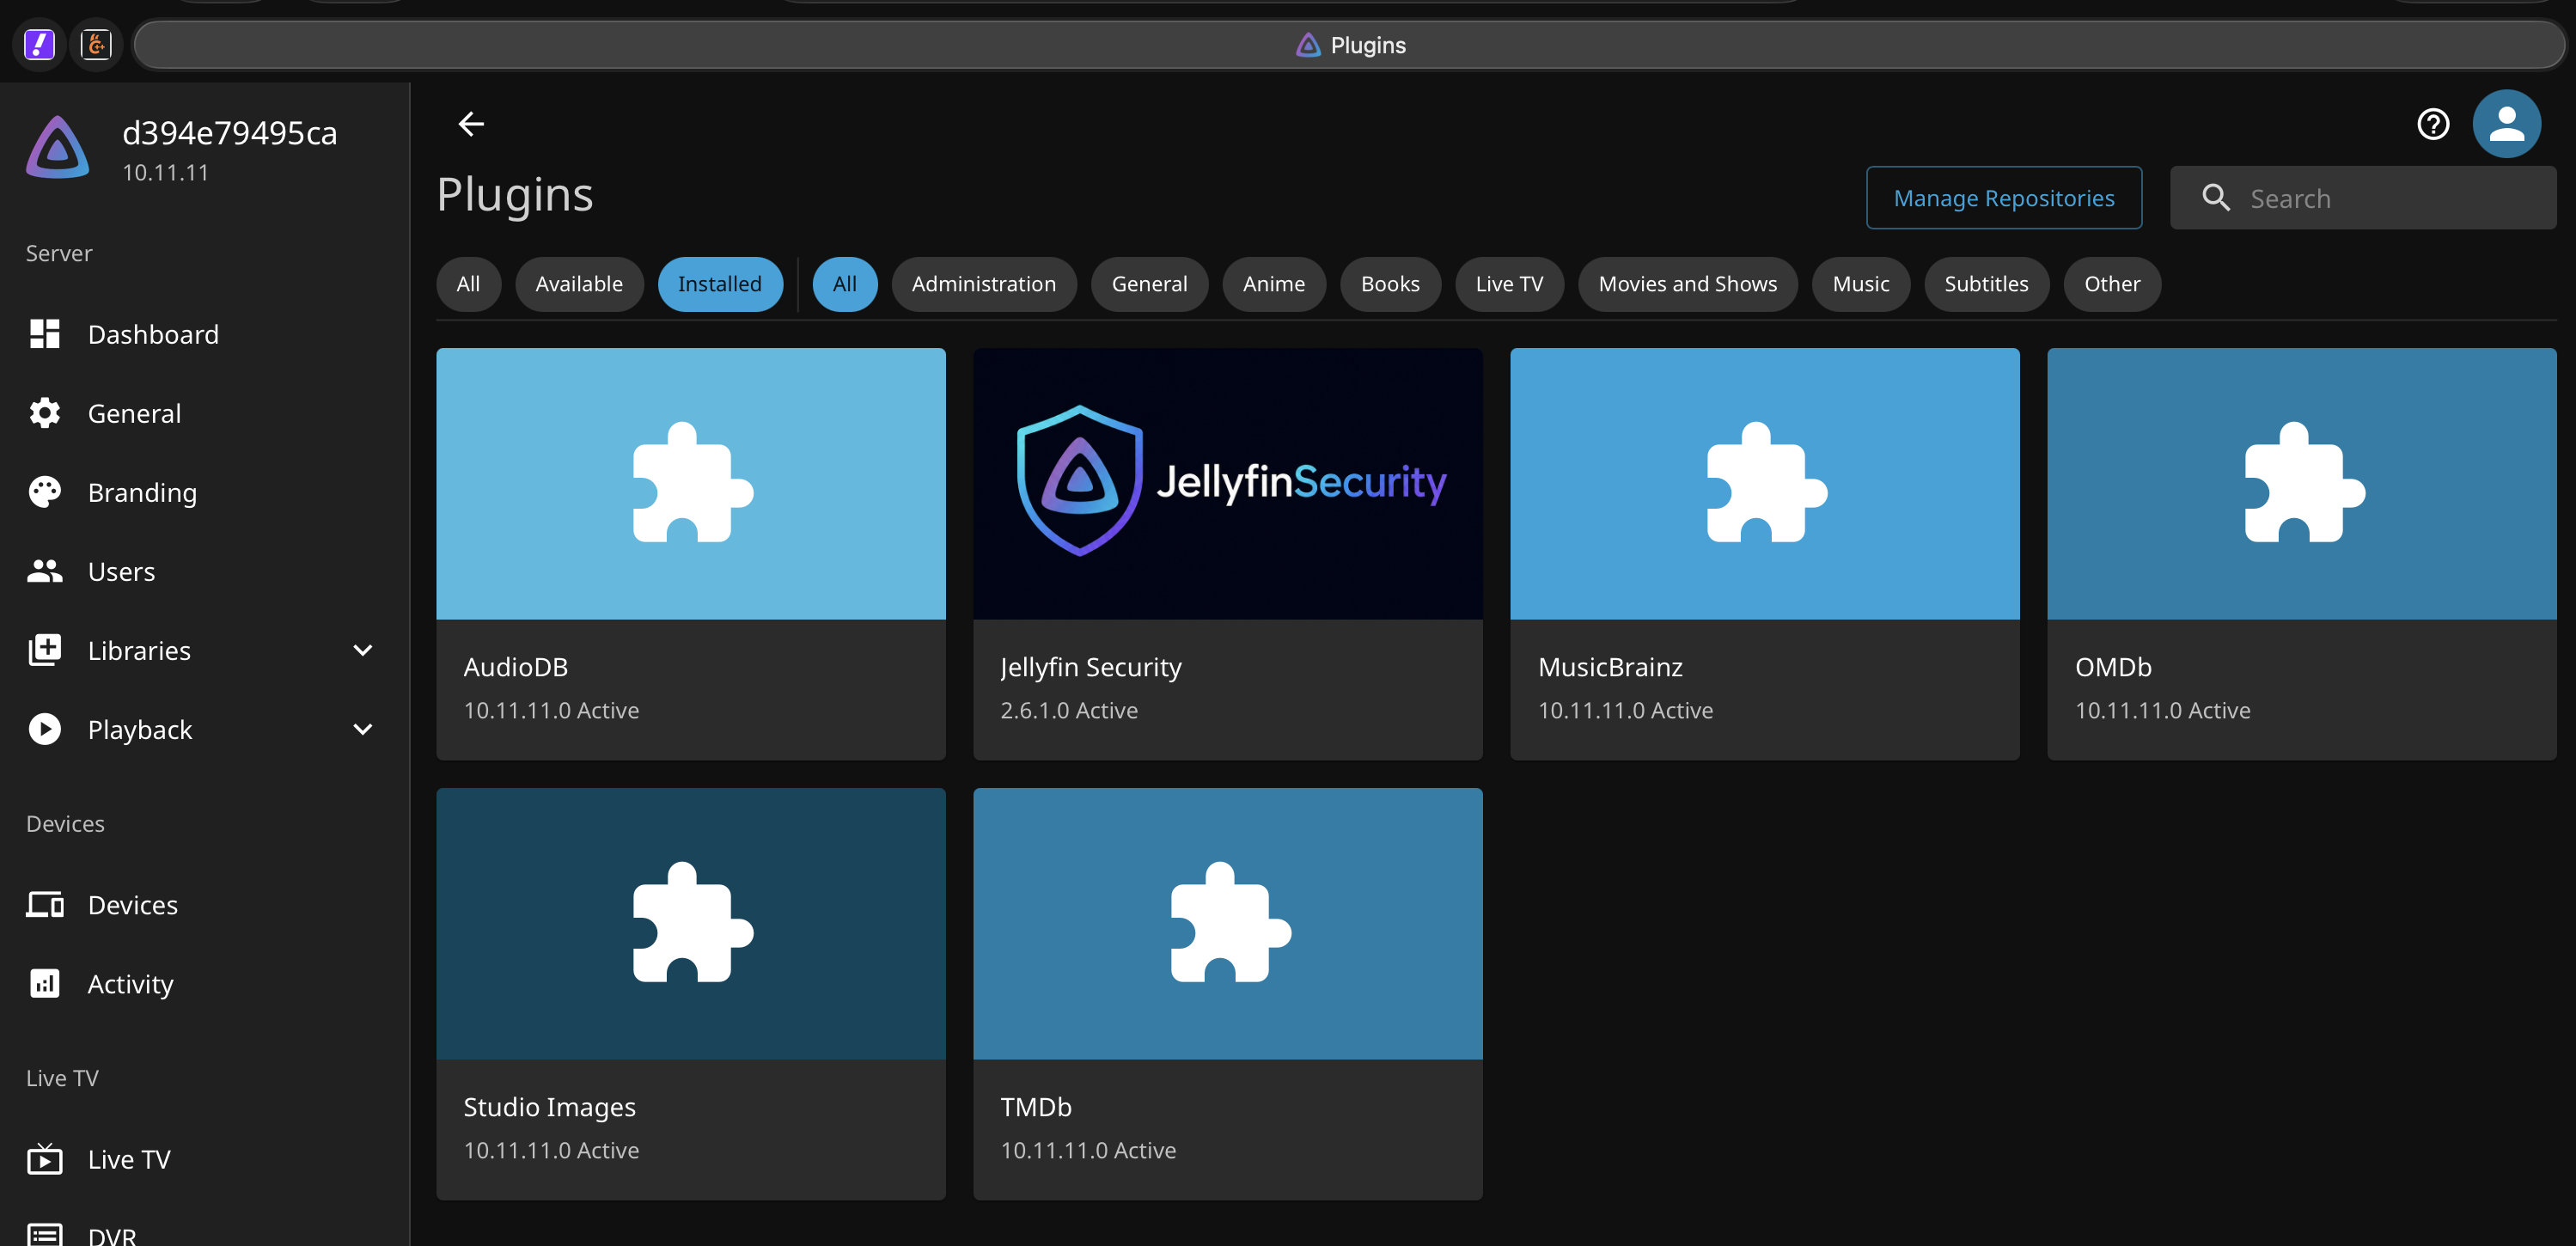
The default installed plugins will show something like the followings:
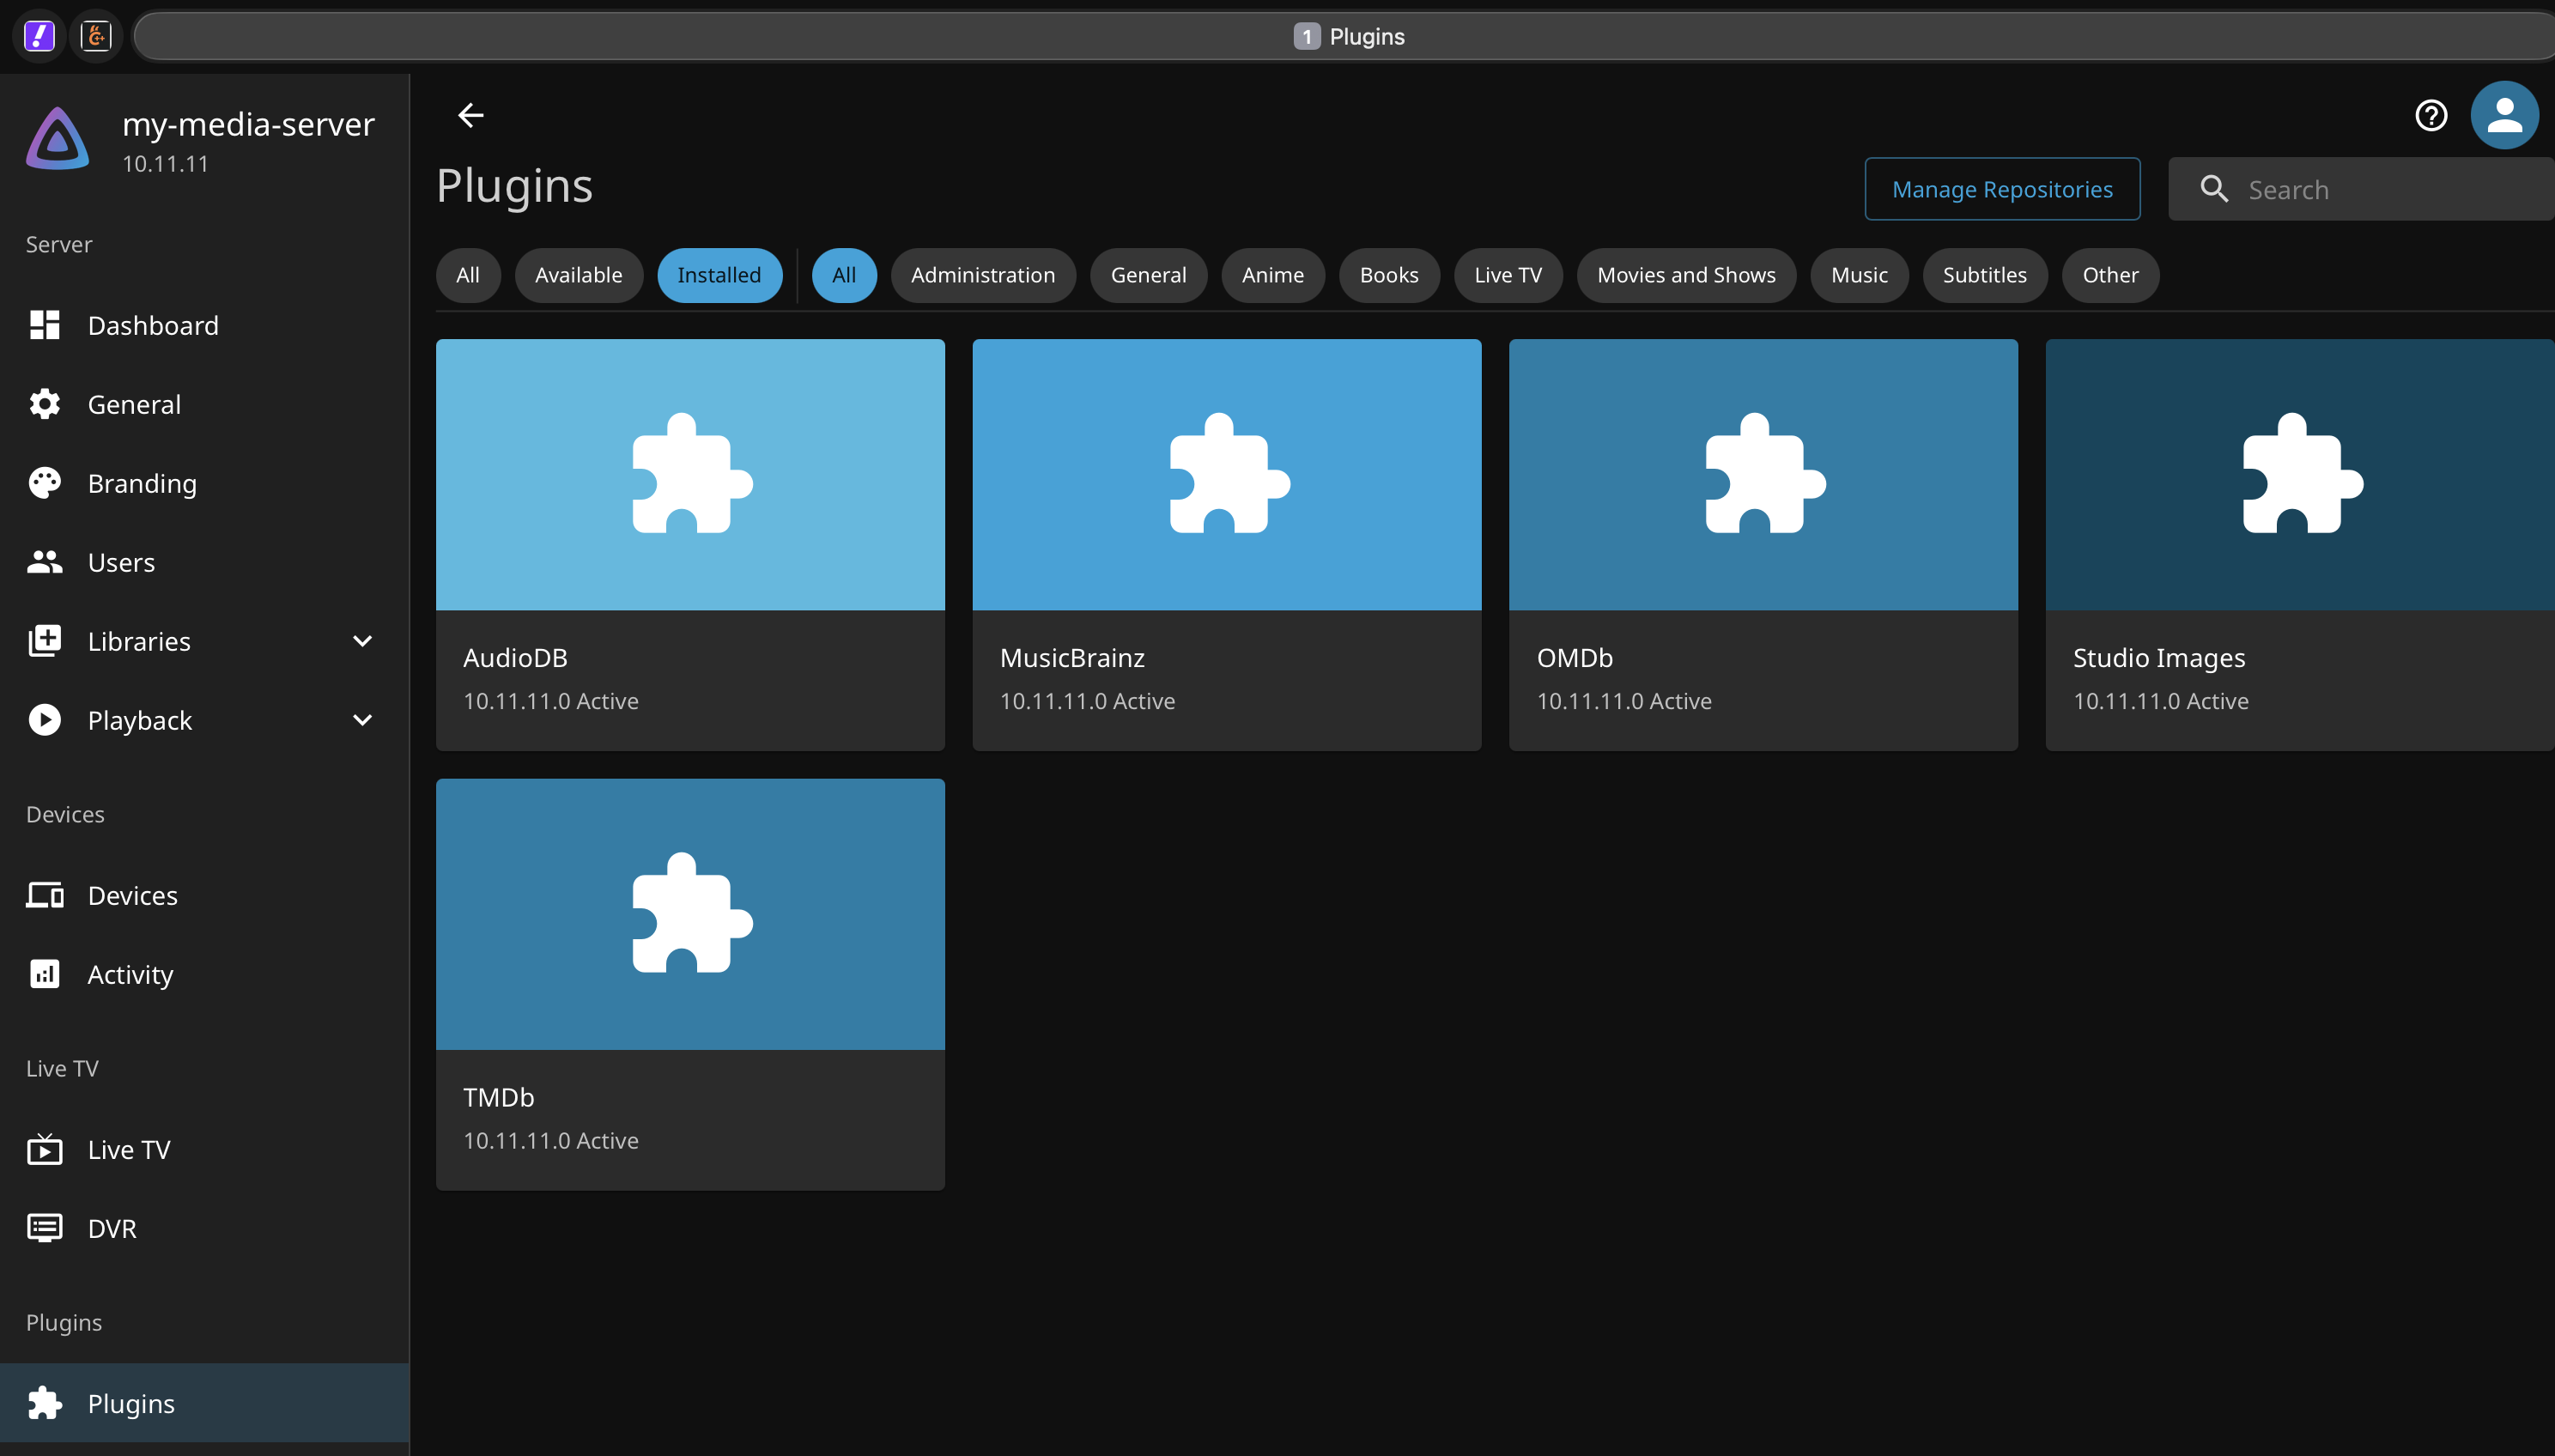
To add new plugins, you can search the existing repository, or add new repository for specific plugins that you may want. However, one challenge you will face here is that the jellyfin instance is fully disconencted, and hence it can't download any plugin directly. The plugin we are primarily intereseted in is the Jellyfin Security plugin.
Adding Security Plugin
Since out jellyfin is disconnected, we somehow need to download a copy of the security plugin and copy that into our server's configuration. This section shows how you can achieve that.
Shortcut
The simplest way to download the plugin files is by running another (temporary) copy of jellyfin container, fully connected to the internet, download plugins that you desire, and then copy over the plugin files to your actual jellyfin instance, and remove that temporary (connected) instance. You can use the steps to download any plugin that you may want, but I will only demonstrate it for the security plugin that enables 2FA.
To start, lets use the following steps to create the temporary (connected) copy of Jellyfin, that is using the directory "/tmp/jfconfig" to store its configuration:
mkdir /tmp/jfconfig
podman run -d --rm --name temp -p 9999:8096 -v /tmp/jfconfig/:/config:Z docker.io/jellyfin/jellyfin:latest
sudo firewall-cmd --add-port=9999/tcp --permanent
sudo firewall-cmd --reload
You can now access this Jellyfin intance, on your local network, using port 9999. For example, if your host's IP address is 192.168.1.140, then point your browser to http://192.168.1.140:9999
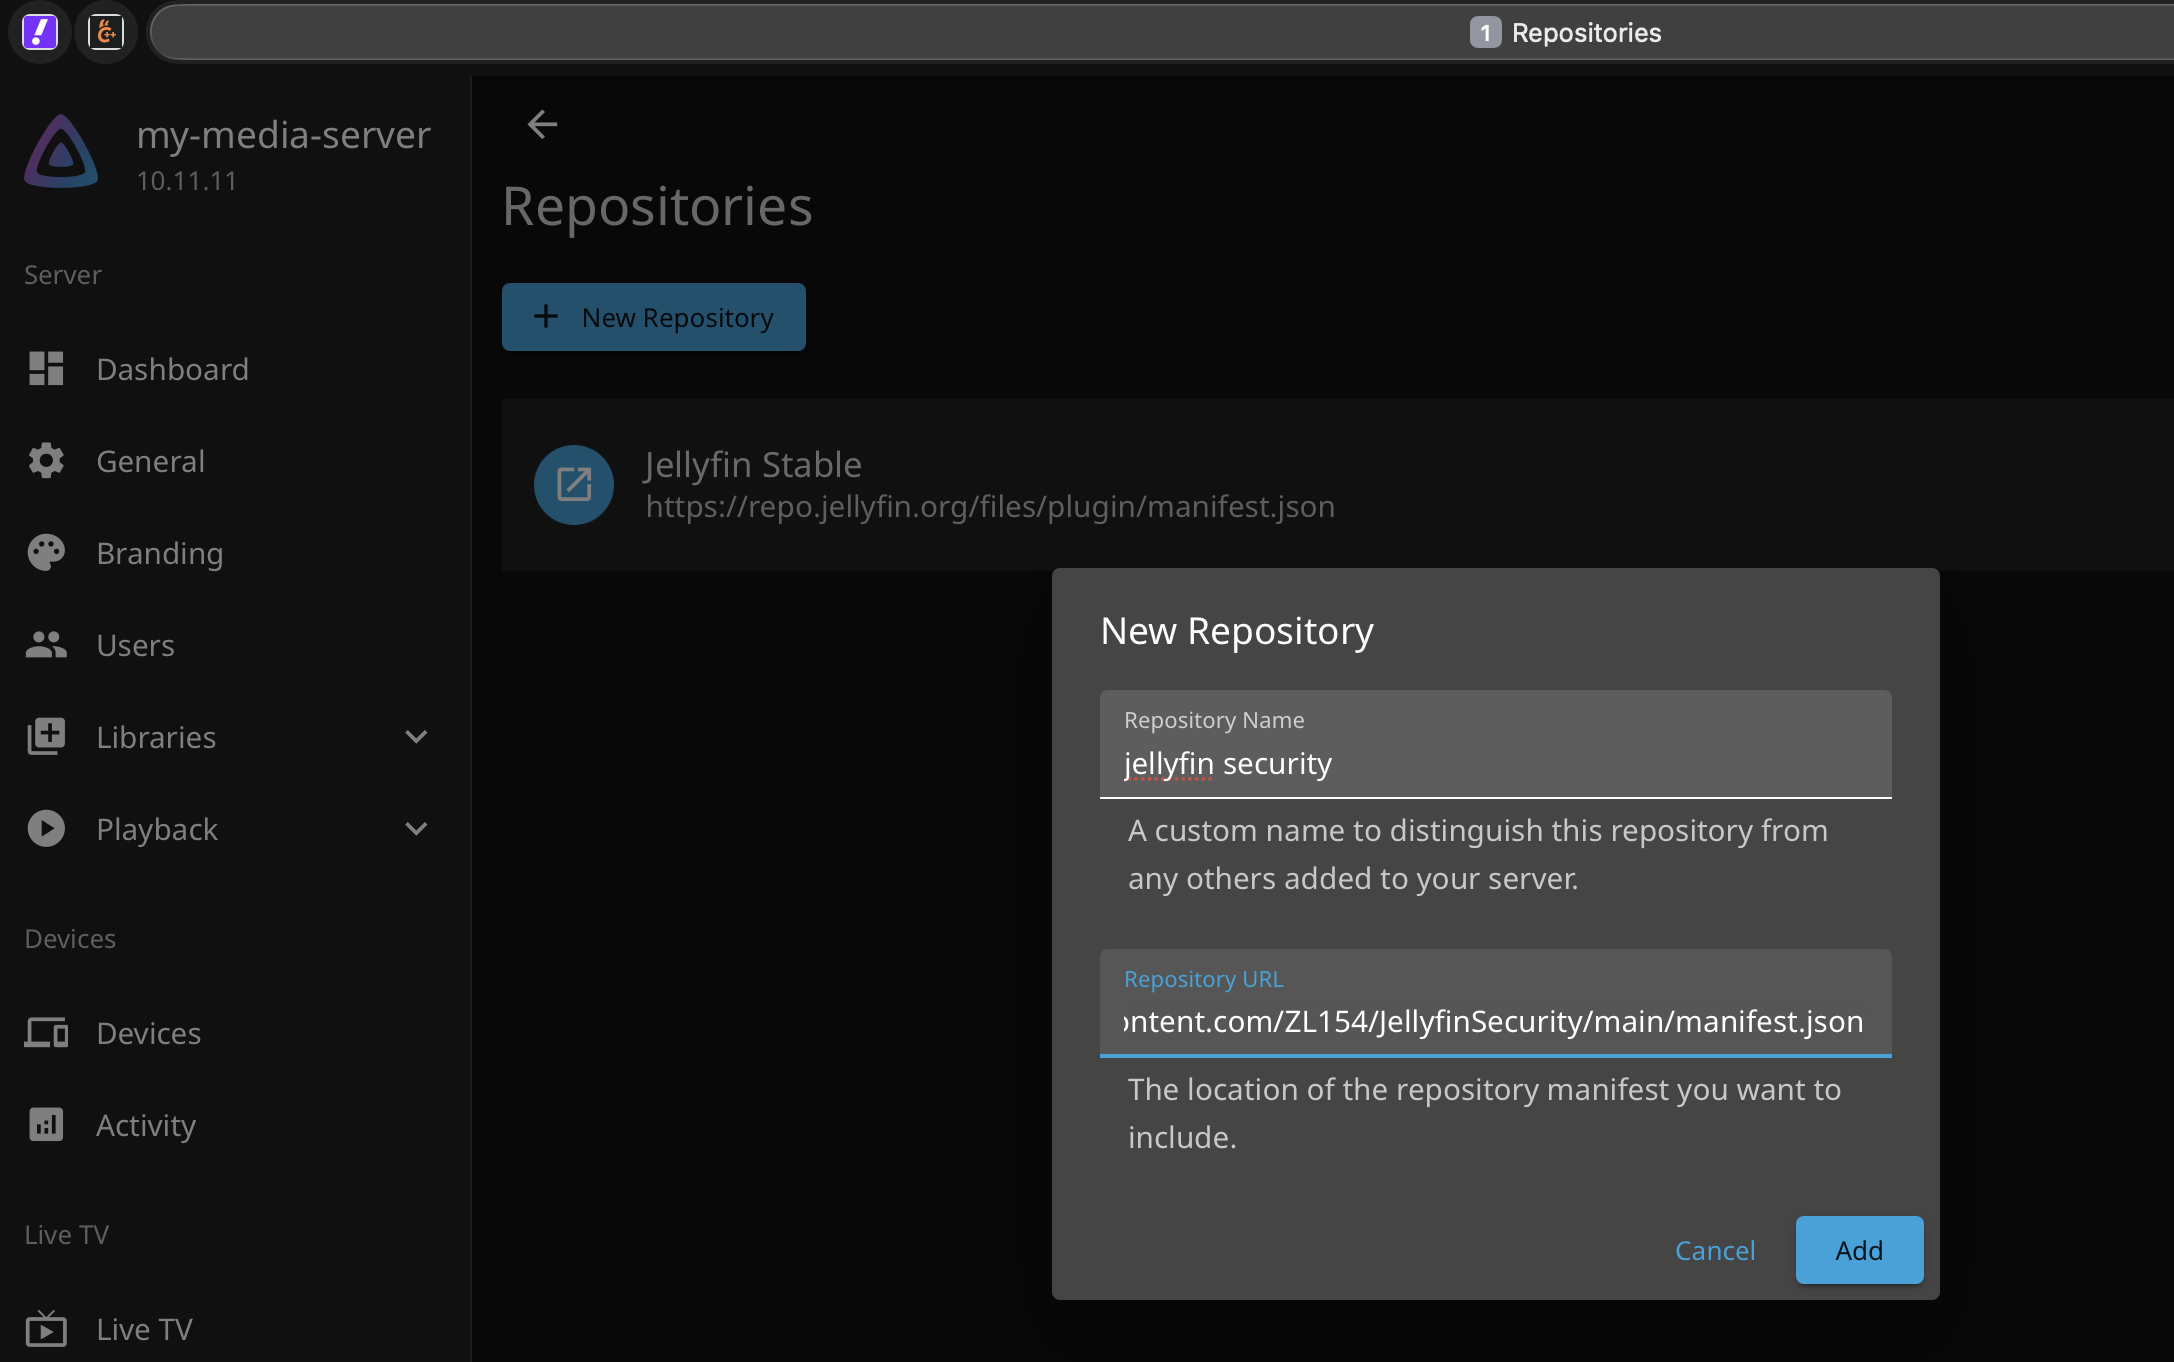
Using the previously described set of steps, configure this jellyfin server, and reach the "plugin" menu. Then choose the "Manage Repositories" option to add a new repository. As shown below, add this new repository: "https://raw.githubusercontent.com/ZL154/JellyfinSecurity/main/manifest.json"
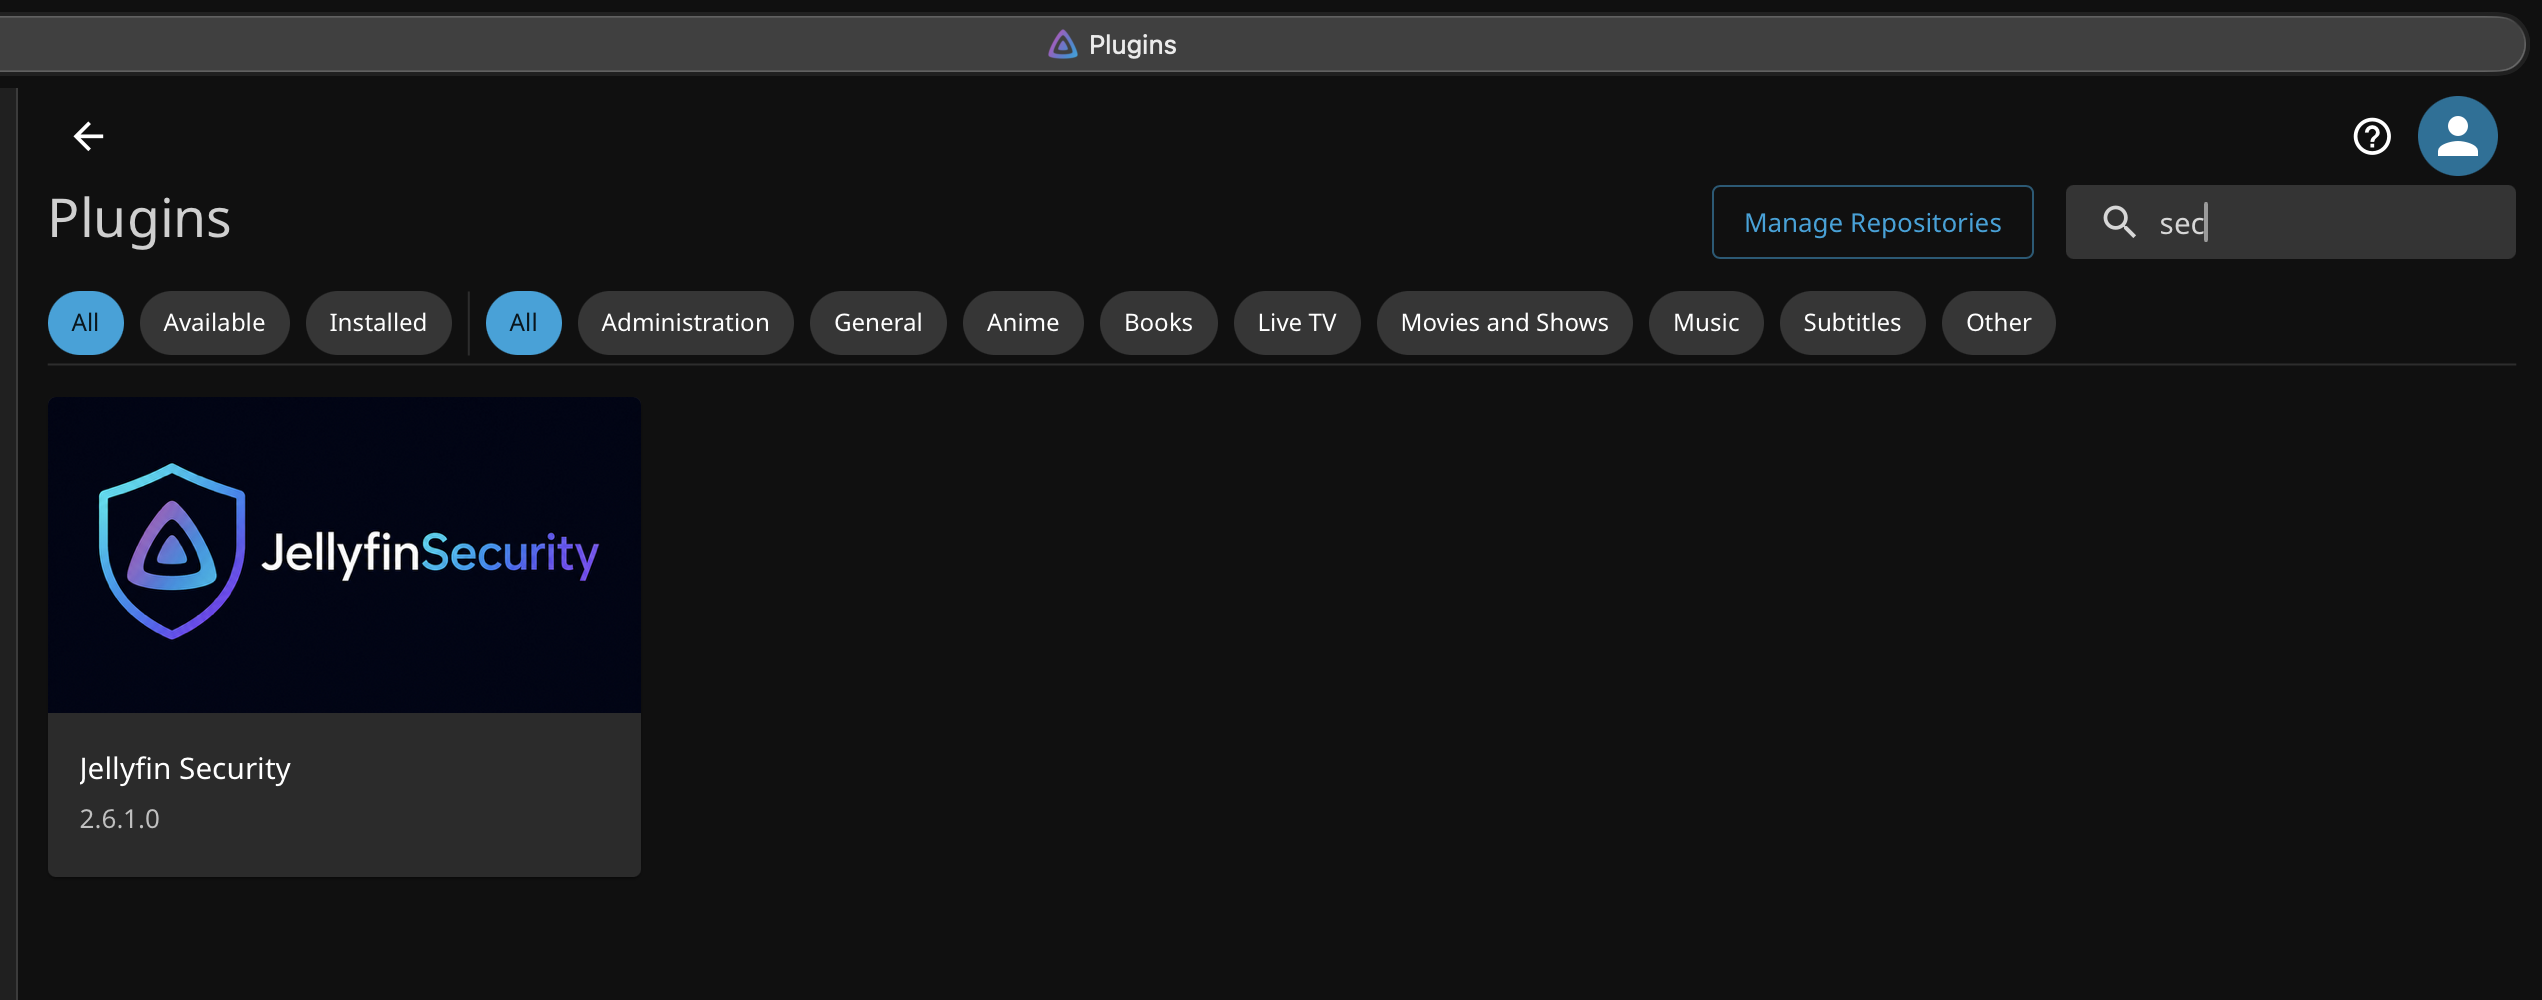
Now on the main plugin page, you can find the "Jellyfin Security" plugin available, as can be seen here:
Go ahead and click on it, and then choose the "Install" option:
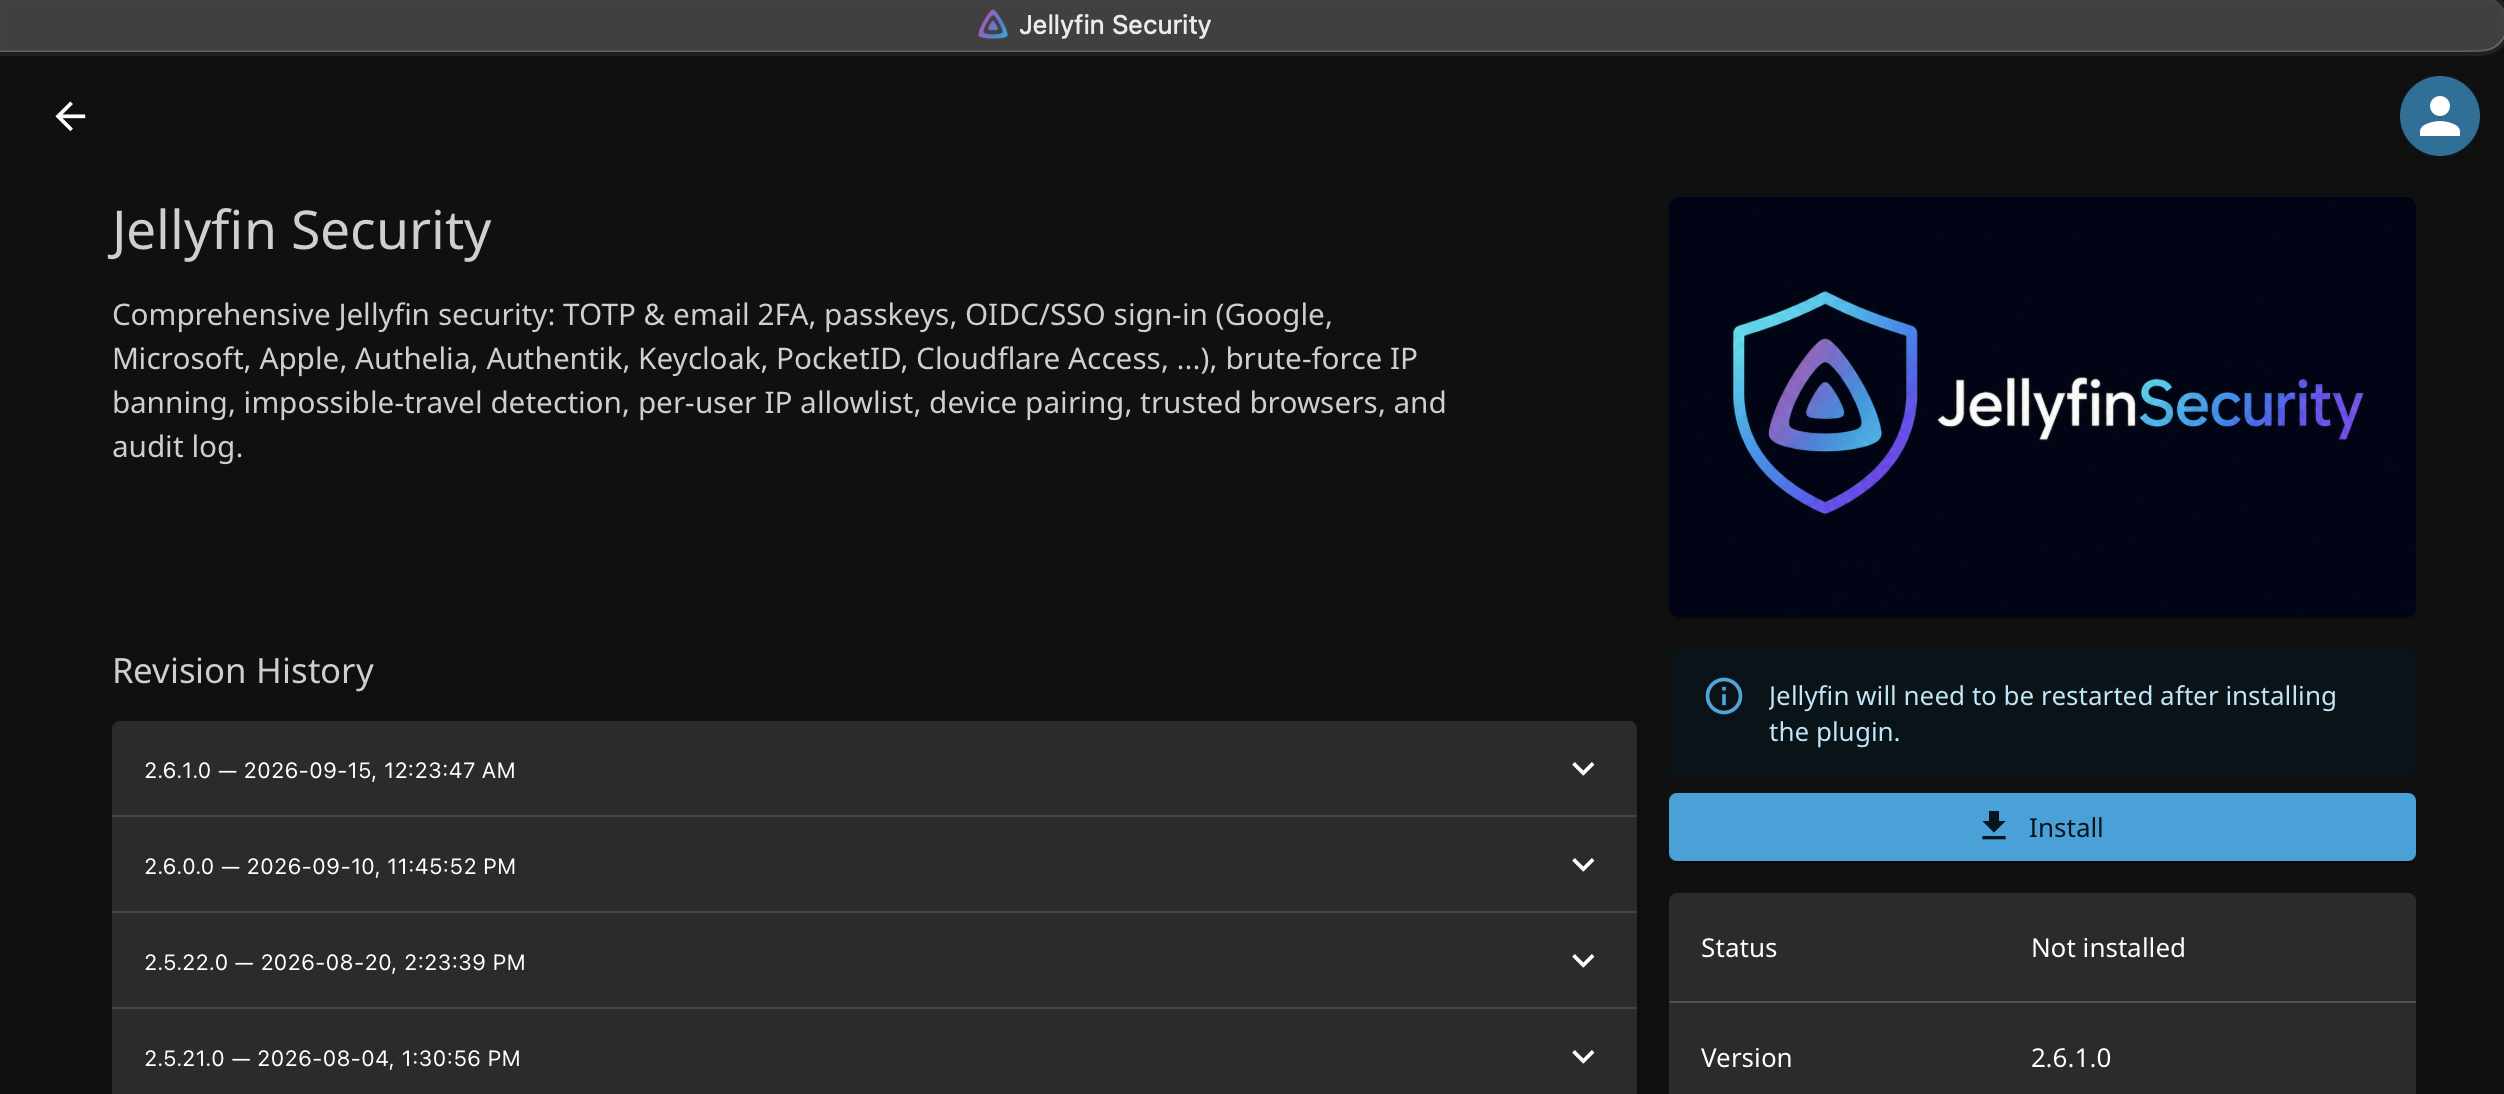
Once this plugin (and any other that you may want to download) are downloaded and installed, the job of the temporary instance is complete. You can now go ahead and delete this temporary instance of jellyfin using the following:
podman stop temp
Installing Security Plugin
So what did we achieve? The downloaded plugins are actually in this location now: "/tmp/jfplugin/plugin/". You can copy this into your "real" jellyfin's configs using the following command:
Tip
cp -r /tmp/plugins/* ~/jellyfin/config/plugins/
At this point, go ahead and restart your jellyfin for the plugin to be loaded. You can do that using the Jellyfin dashboard, but I prefer to do that using systemctl instead so that all the changes properly take effect:
systemctl --user restart jellyfin.service
Now with the plugin installed, when you login to your jellyfin instance, and go to the plugin section, you will see it listed there as shown here:
There are a number of security features this plugin provides. The minuimum ones that I would recommend are the ones showin in the following image as this will enable 2FA for all the users, disable email recovery, and skip 2FA for LAN requests (you will have to enter the appropriate LAN subnets in the field towards the bottom of this image:
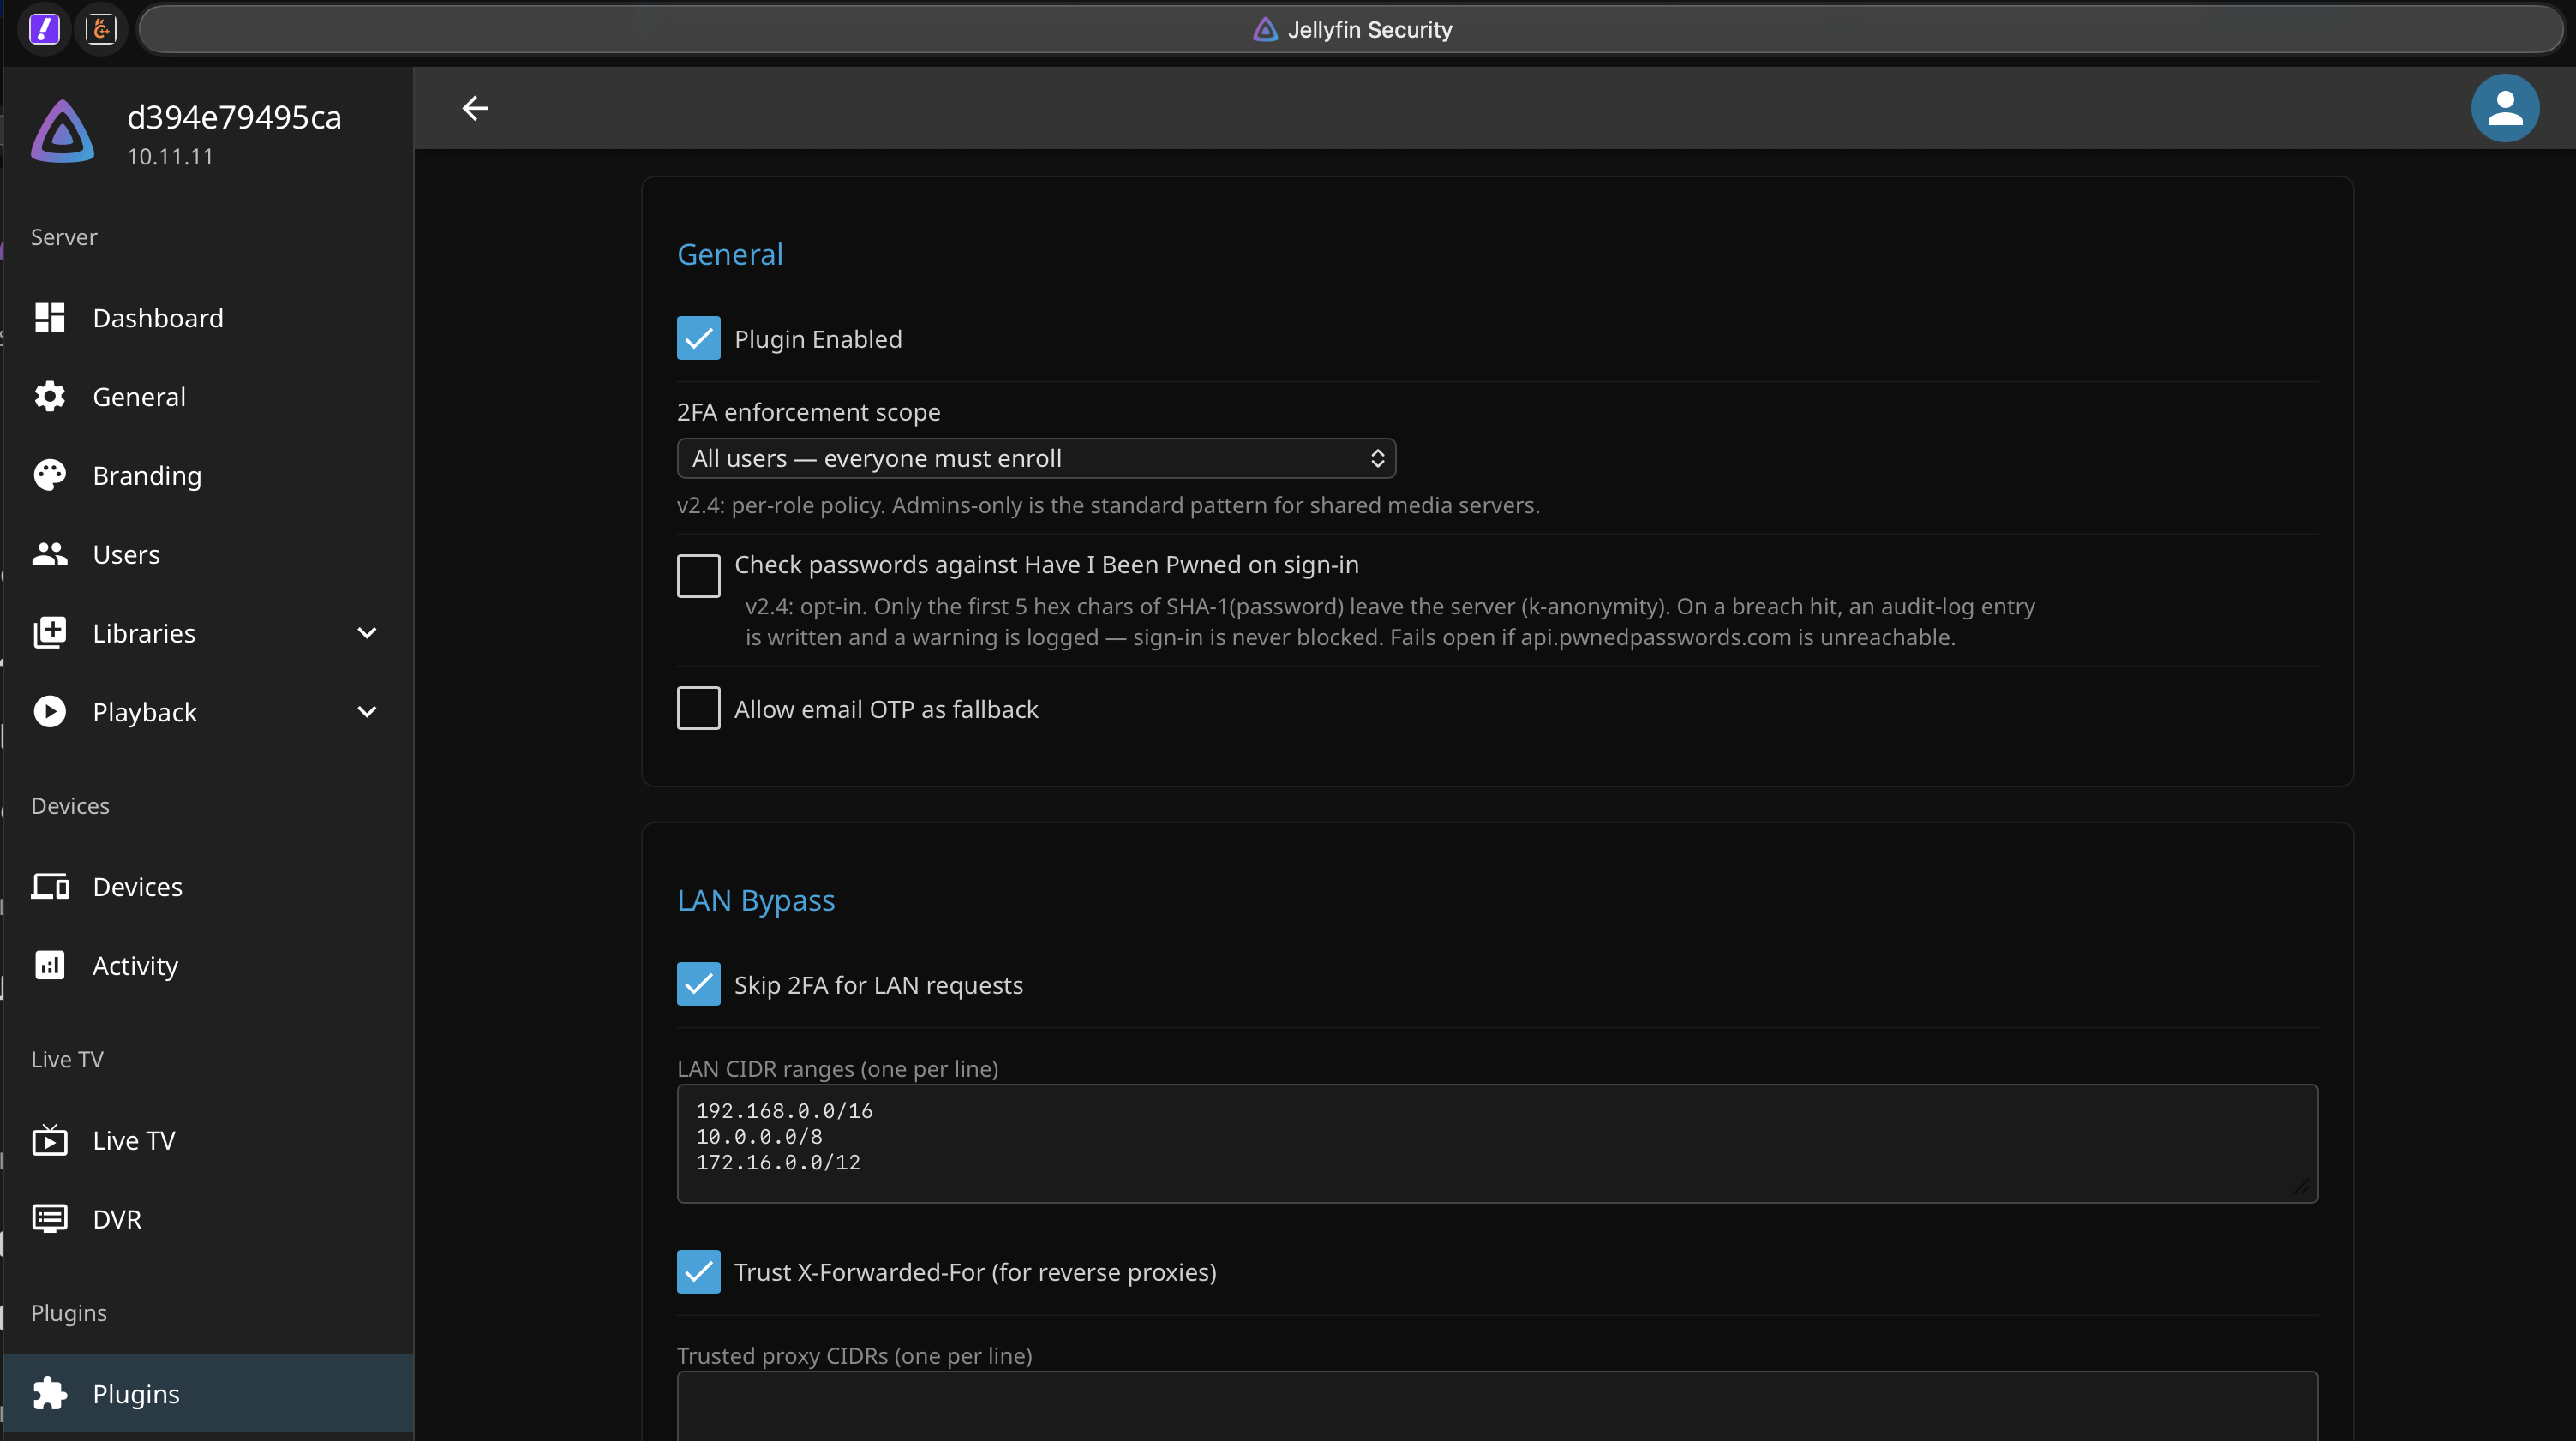
You may also want to look at the other options such as password strength enforcement etc.
Backing up your media
Now that the server is ready and secured, there is one last requirement that is yet to be met, i.e. backing up your prestigious media files to a secure and safe loction. One simple way would have been use of RAID disk upfront, but that protects only against local disk failure. Most of us (if not all!) have a large amount of public cloud storage avaialable which they aren't fully utilizing. Your Gdrive, Onedrive, etc. may be offering you Terabytes that may be heavily underutilized. So I opted to use that spare space as backup for my local media. When using as a backup location and storing raw files on it, I don't risk loss of image/video quality, and yet utilize the space for free.
You may be thinking at this point, how do I backup your locally stored media files to a public cloud account? As always, I looked for possibly options available through the open source community and found the perfect solution offered by an open-source mature tool called rclone. You can intstall and run it directly on your host machine, but personally I always prefer to use containers to isolate and limit applications that don't need to run on the host. So I have built a simple container for rclone, and you can find it here. You don't need to build the container however, the steps below will directly pull from my public container registry.
Lets go ahead and perform this one time configuration for rclone:
mkdir ~/rclone
podman run -it --rm  --name rclone -v ~/rclone:/root/.config/rclone:Z quay.io/sfhassan/rclone rclone config
When you run the above commands, rclone will present to you an interactive menu for first time configuration, like the one shown here:
Trying to pull quay.io/sfhassan/rclone:latest...
Getting image source signatures
Copying blob 4523943475c4 skipped: already exists
Copying blob 42ced0cd92d6 skipped: already exists
Copying blob 2a6eae3b626b skipped: already exists
Copying blob a778088874e2 skipped: already exists
Copying config 9e80b63794 done   |
Writing manifest to image destination
2026/09/17 22:34:38 NOTICE: Config file "/root/.config/rclone/rclone.conf" not found - using defaults
No remotes found, make a new one?
n) New remote
s) Set configuration password
q) Quit config
n/s/q>
The configuration from this point onwards can vary depending on which cloud storage service you are using. I will demonstrate the steps used for Google-Drive in the snippets that follow:
No remotes found, make a new one?
n) New remote
s) Set configuration password
q) Quit config
n/s/q> n

Enter name for new remote.
name> my_gdrive

Option Storage.
Type of storage to configure.
Choose a number from below, or type in your own value.
 1 / 1Fichier
   \ (fichier)
 2 / Akamai NetStorage
   \ (netstorage)
 3 / Alias for an existing remote
   \ (alias)
[[ SNIPPED ]]
23 / Google Cloud Storage (this is not Google Drive)
   \ (google cloud storage)
24 / Google Drive
   \ (drive)
25 / Google Photos
   \ (google photos)
[[ SNIPPED ]]
Storage> drive
The steps involved from this point onwards will vary based on the choice you make for the storage provider. Rclone's site documents the needed steps in a very detaled way, and I don't need to replicate those here. You would find those easy to follow in general.
Once this process is complete, a config file is saved by rclone into the directory you specified. So now you can simply run rclone everytime you would like your local media to be backed up on the remote storage location, for example:
podman run -it --rm --name rclone -v ~/rclone:/root/.config/rclone:Z -v ~/media/:/media:ro quay.io/sfhassan/rclone rclone sync -P -L /media my_gdrive:media/
All done!
Horray! you are all set and your personal, private, secure, and roboust media server should now be all good to go. I hope the steps were easy and simple to follow. Please share any feedback you may want to share via email