A Short & Simple Guide to Add Magical Powers to VSCode - while keeping it all local and private!
At a glance !!
If you are running your LLM model locally, and you would like use it for enabling "Claud Code" or "Cursor" like capabilities, this blog is for you. The blog shows in few simple steps how you add this to your VSCode. Lets get started ...
Pre-Requisite
There are two simple pre-requisites here:
- VS Code installed on your local machine
-
A local LLM running and reachable. If you are using a Mac with M-series processor, you may want to reference this blog on how you run an LLM locally on the Mac using its GPU
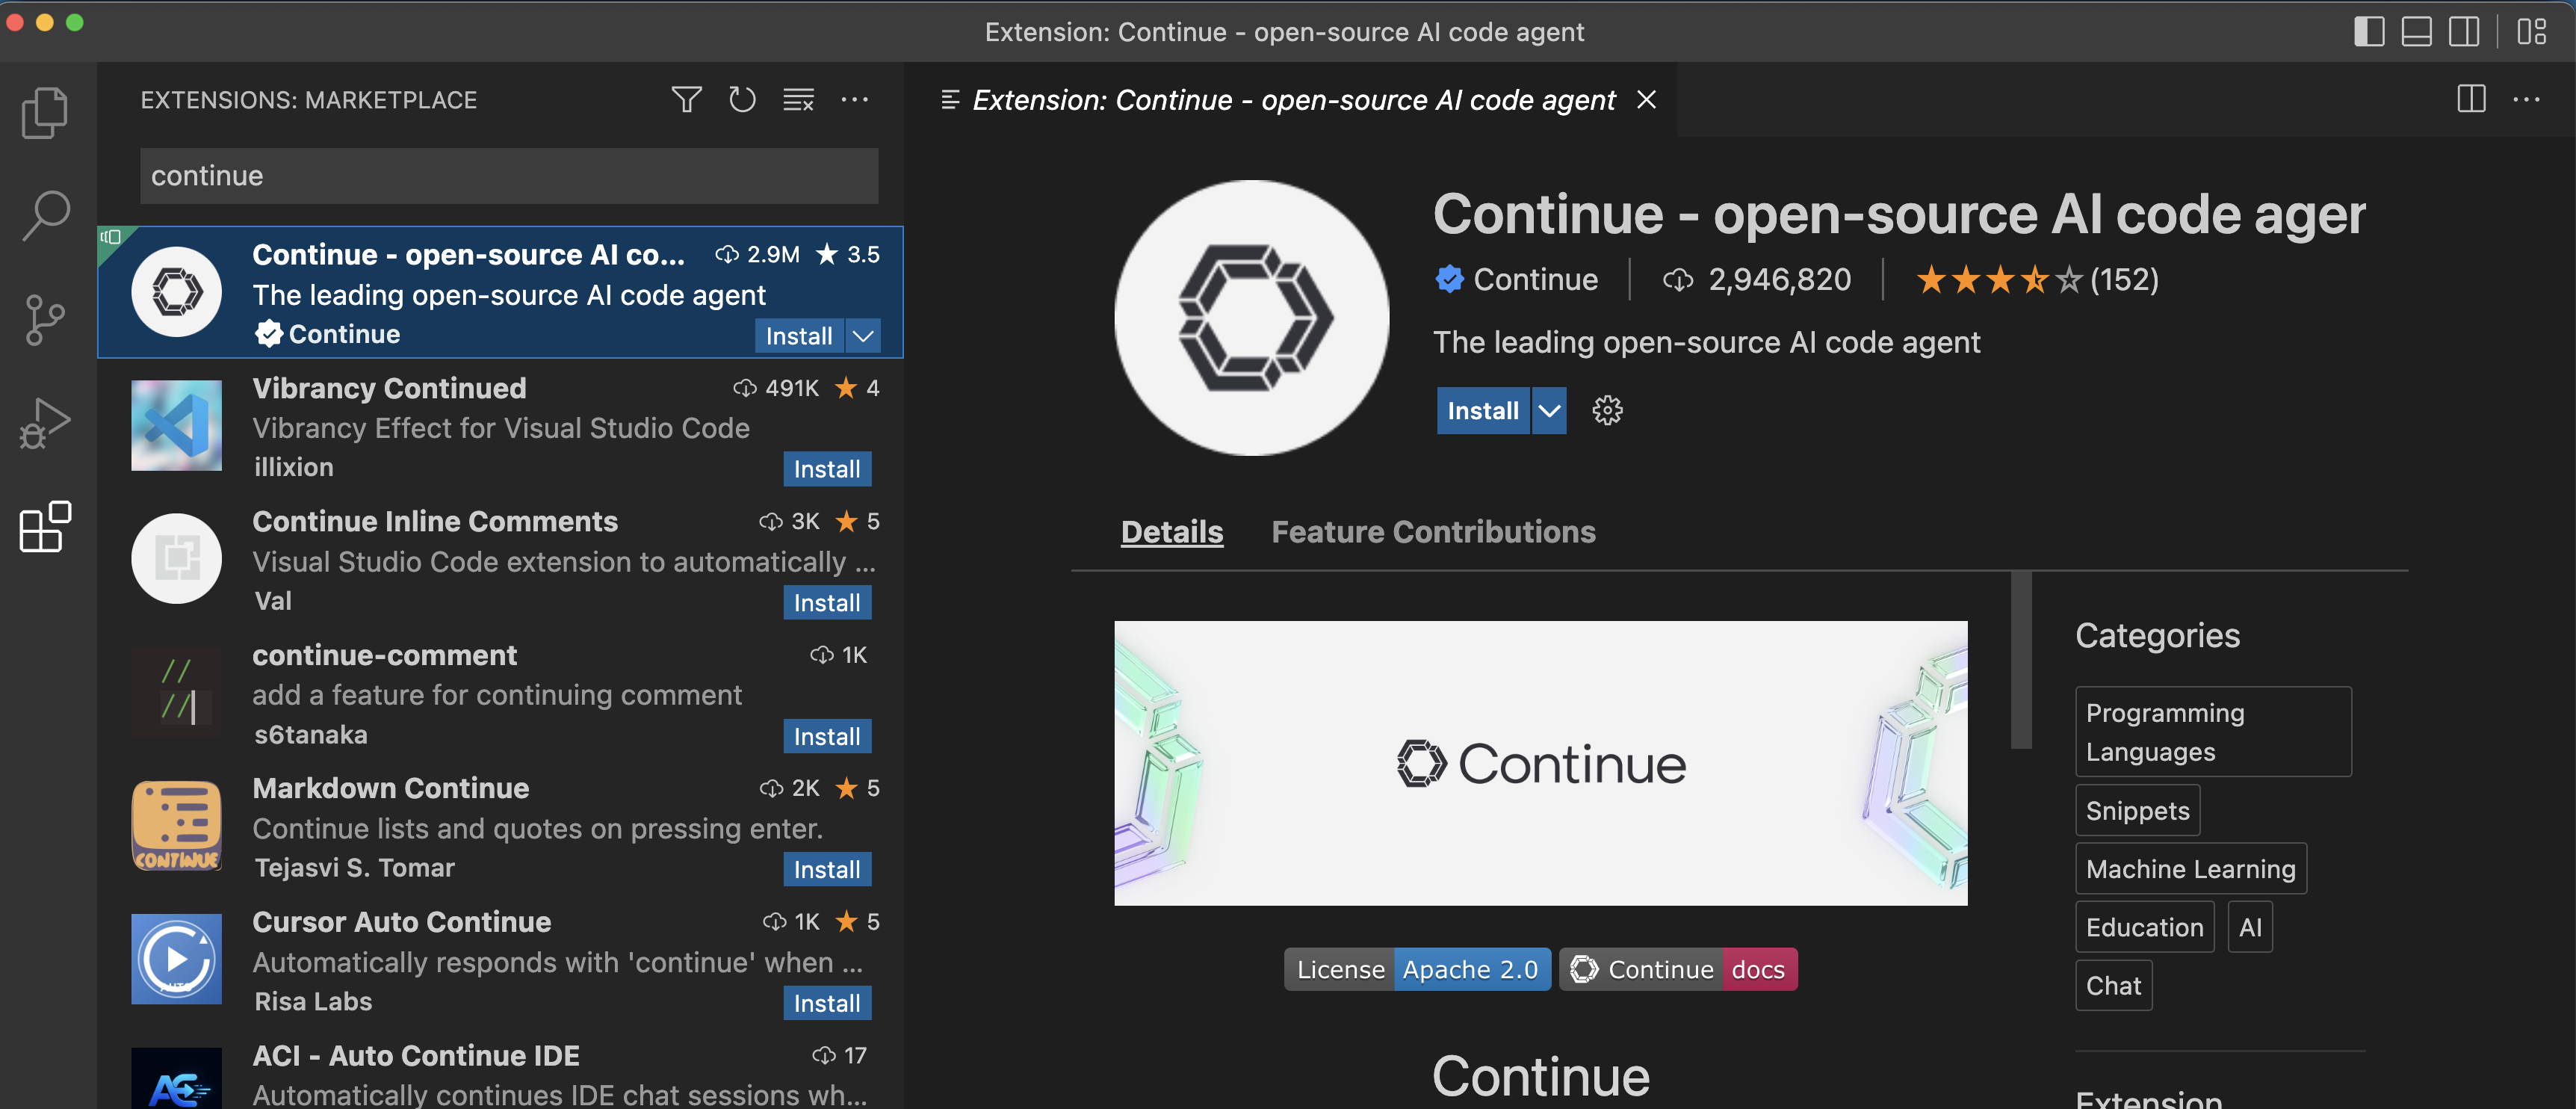
Step#1: Installing "Continue" Extension
Continue is an AI Code agent that works as an Extension for VSCode. Since you have VSCode already installed, simply choose the "Extension" menu option from the left-hand-side pane, and serch for continue. Go ahead and install this extension...
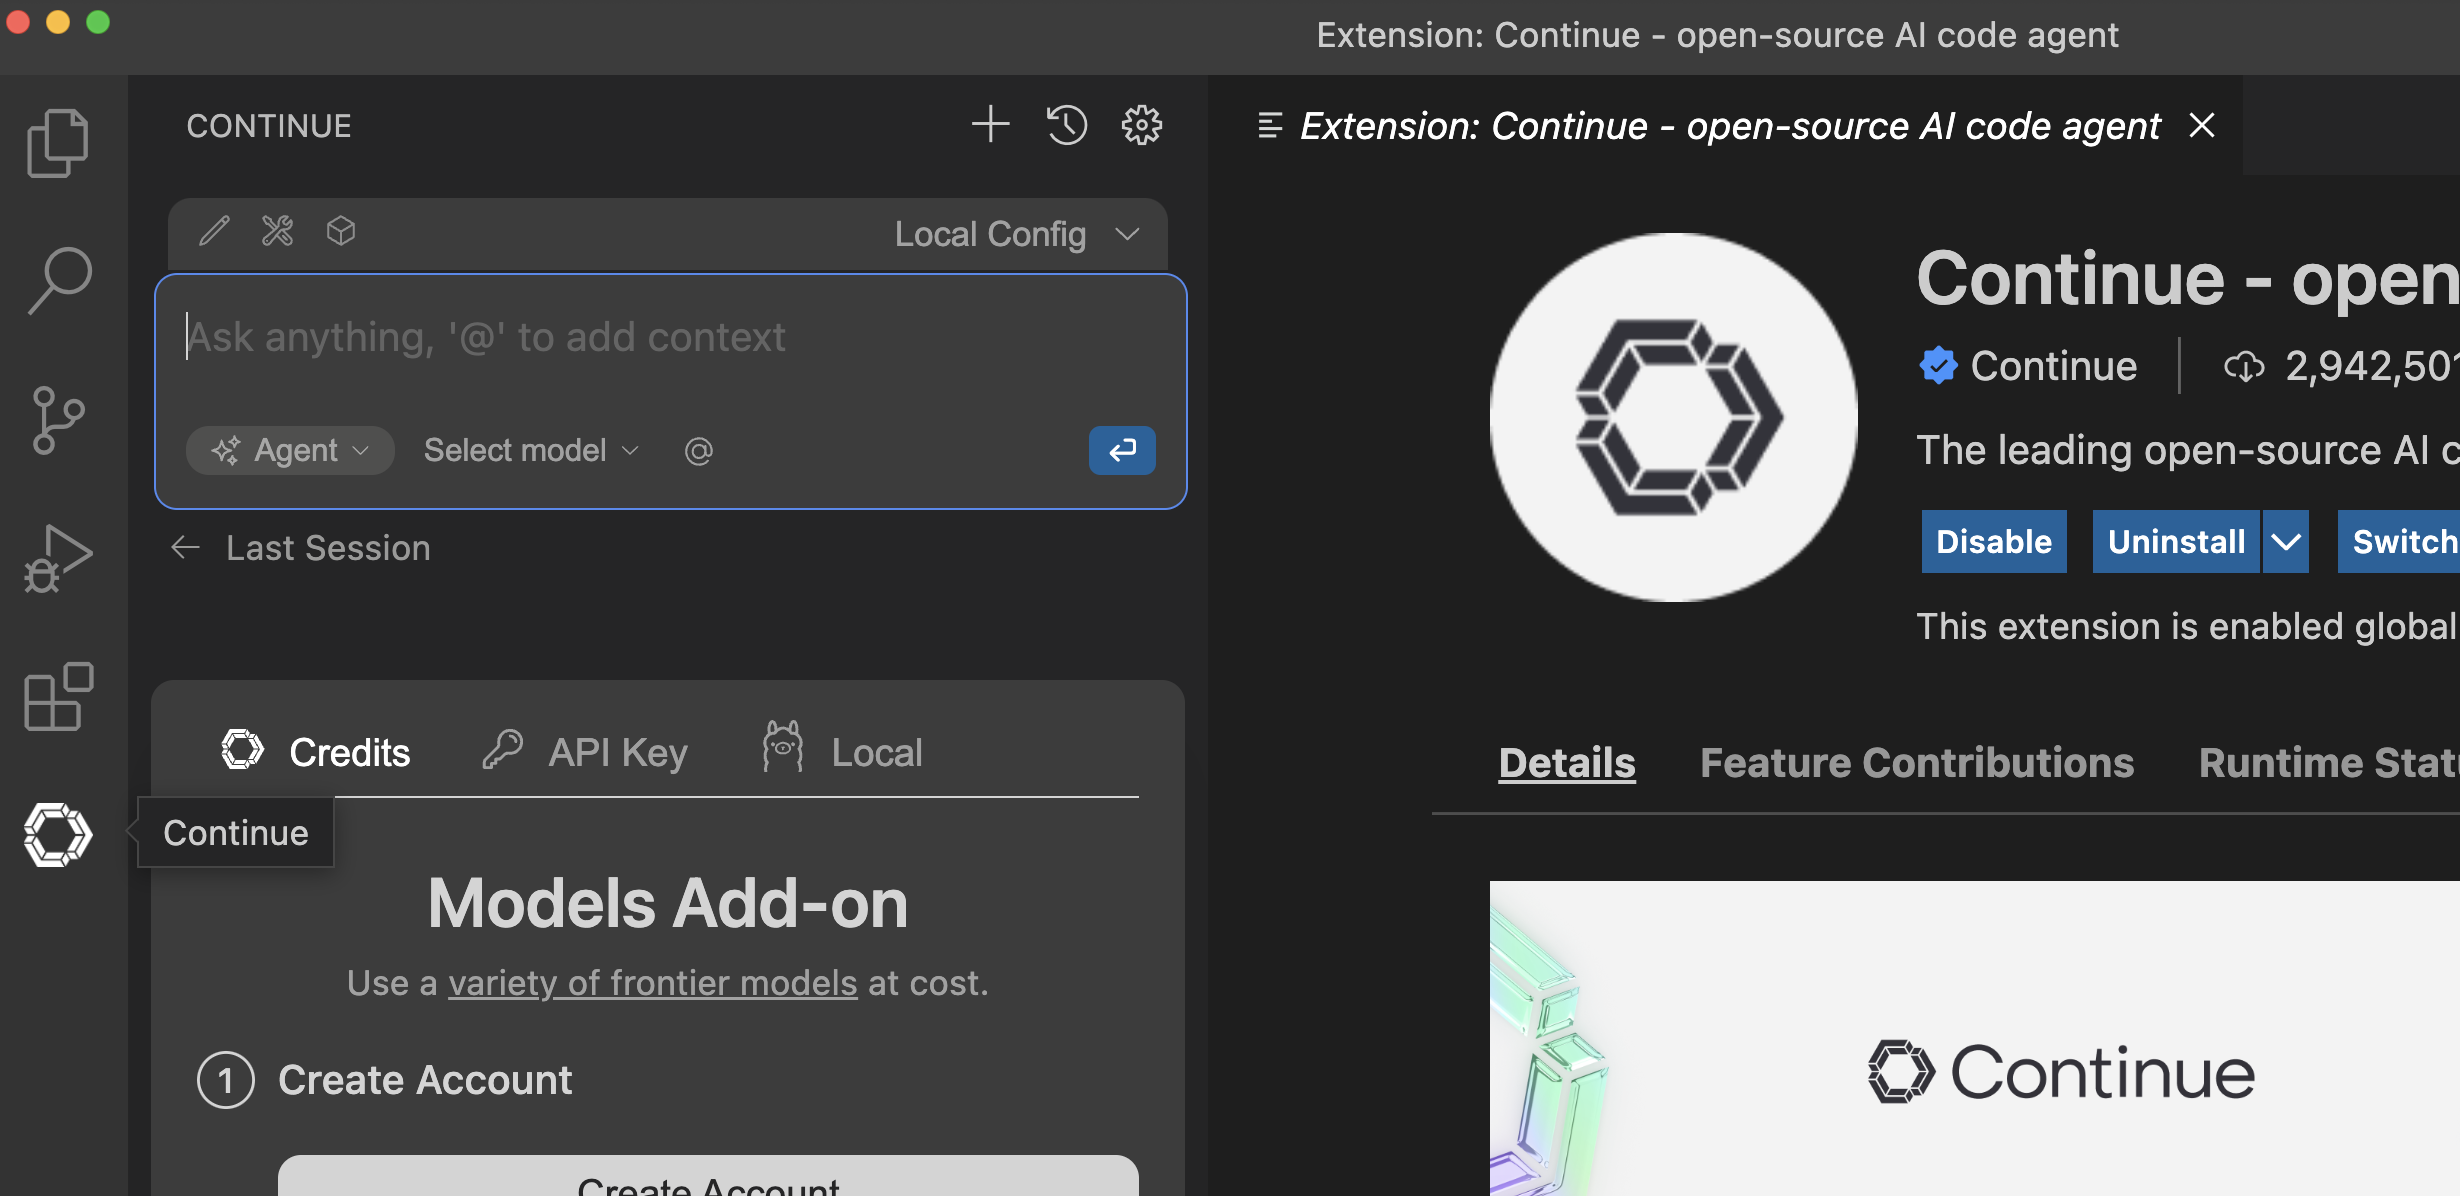
Step#2: pen the Local Configuration for "Continue"
Once you have installed "continue", you shall see its icon on the left-hand-side pane. Go ahead and click on it to open its pane.
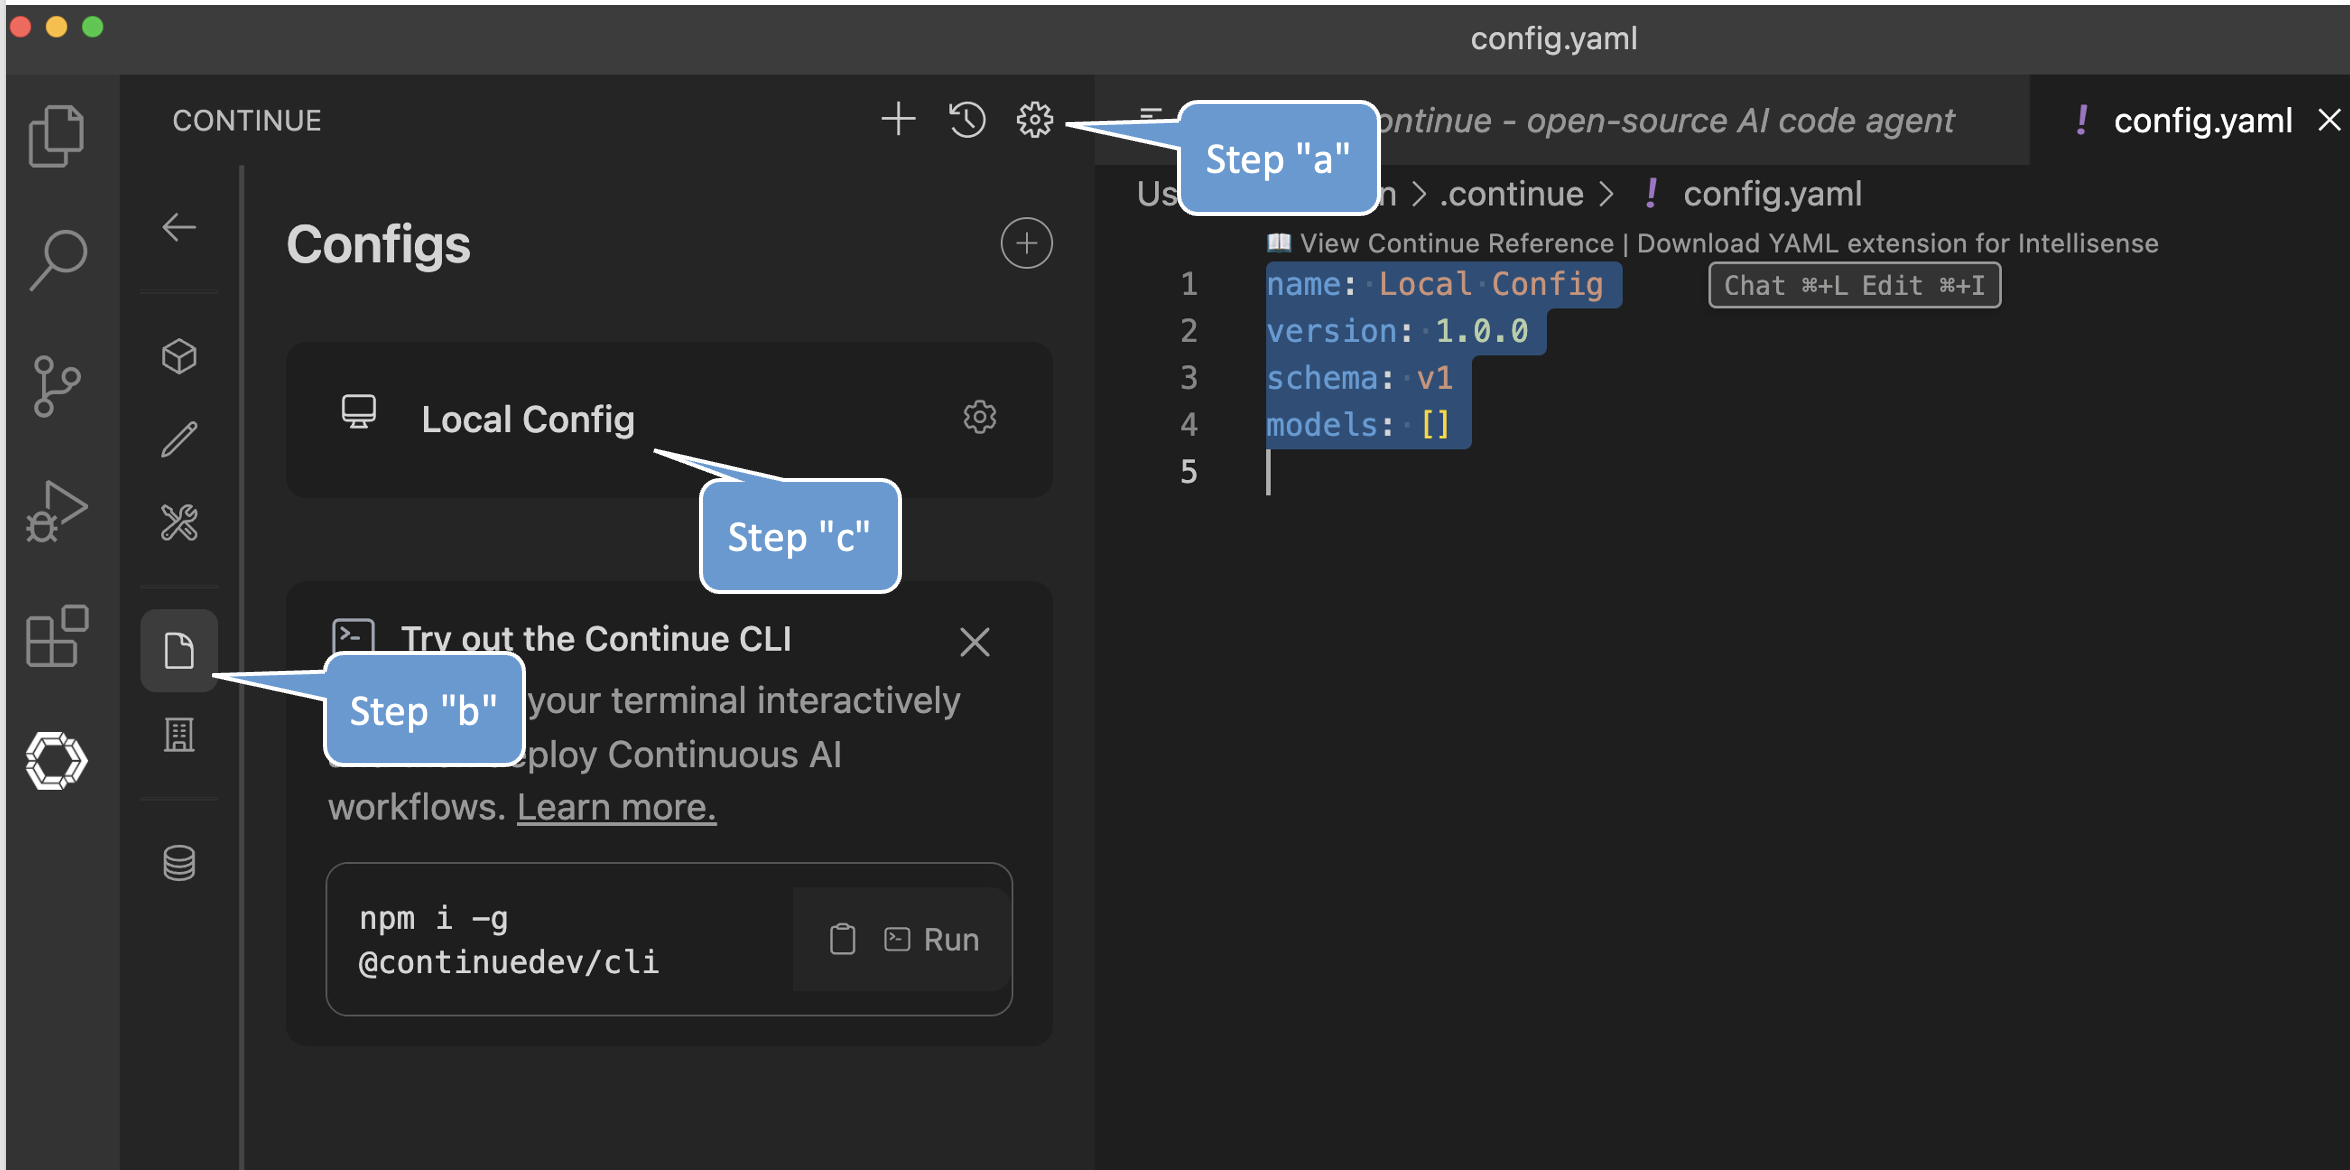
Now in the "Contiunue" Pane, select the gear icon on the top right (step "a" in the figure below), then select the "configs" icon in the newly opened settings pane (step "b" in the figure below), and then select the "local config" option (step "c" in the figure below)
Step#3: Configure "Continue" to use local model
Use the following configuration and paste that into the "configs.yaml" file that has been opened for edit. Replace the existing contaent. Note this configuration assumes that your local LLM is available at http://127.0.0.1:8080/, and has the model "ggml-org/gemma-4-E2B-it-GGUF" loaded. The steps in previously referenced blog show you exactly how do that on a Mac-M-series. On a different device, or different type of model, you can make changes to this config accordingly; just change the "model" or "apiBase" fields.
If you are running ollama or liteLLM or any other local model-runtime, you can change the "provider" value accordingly. "Continue" also offers a drop down menu configuration for these well known model-runtimes. But for the purely local custom setup, like ours, you need the configs.yaml file edited manually using the following example:
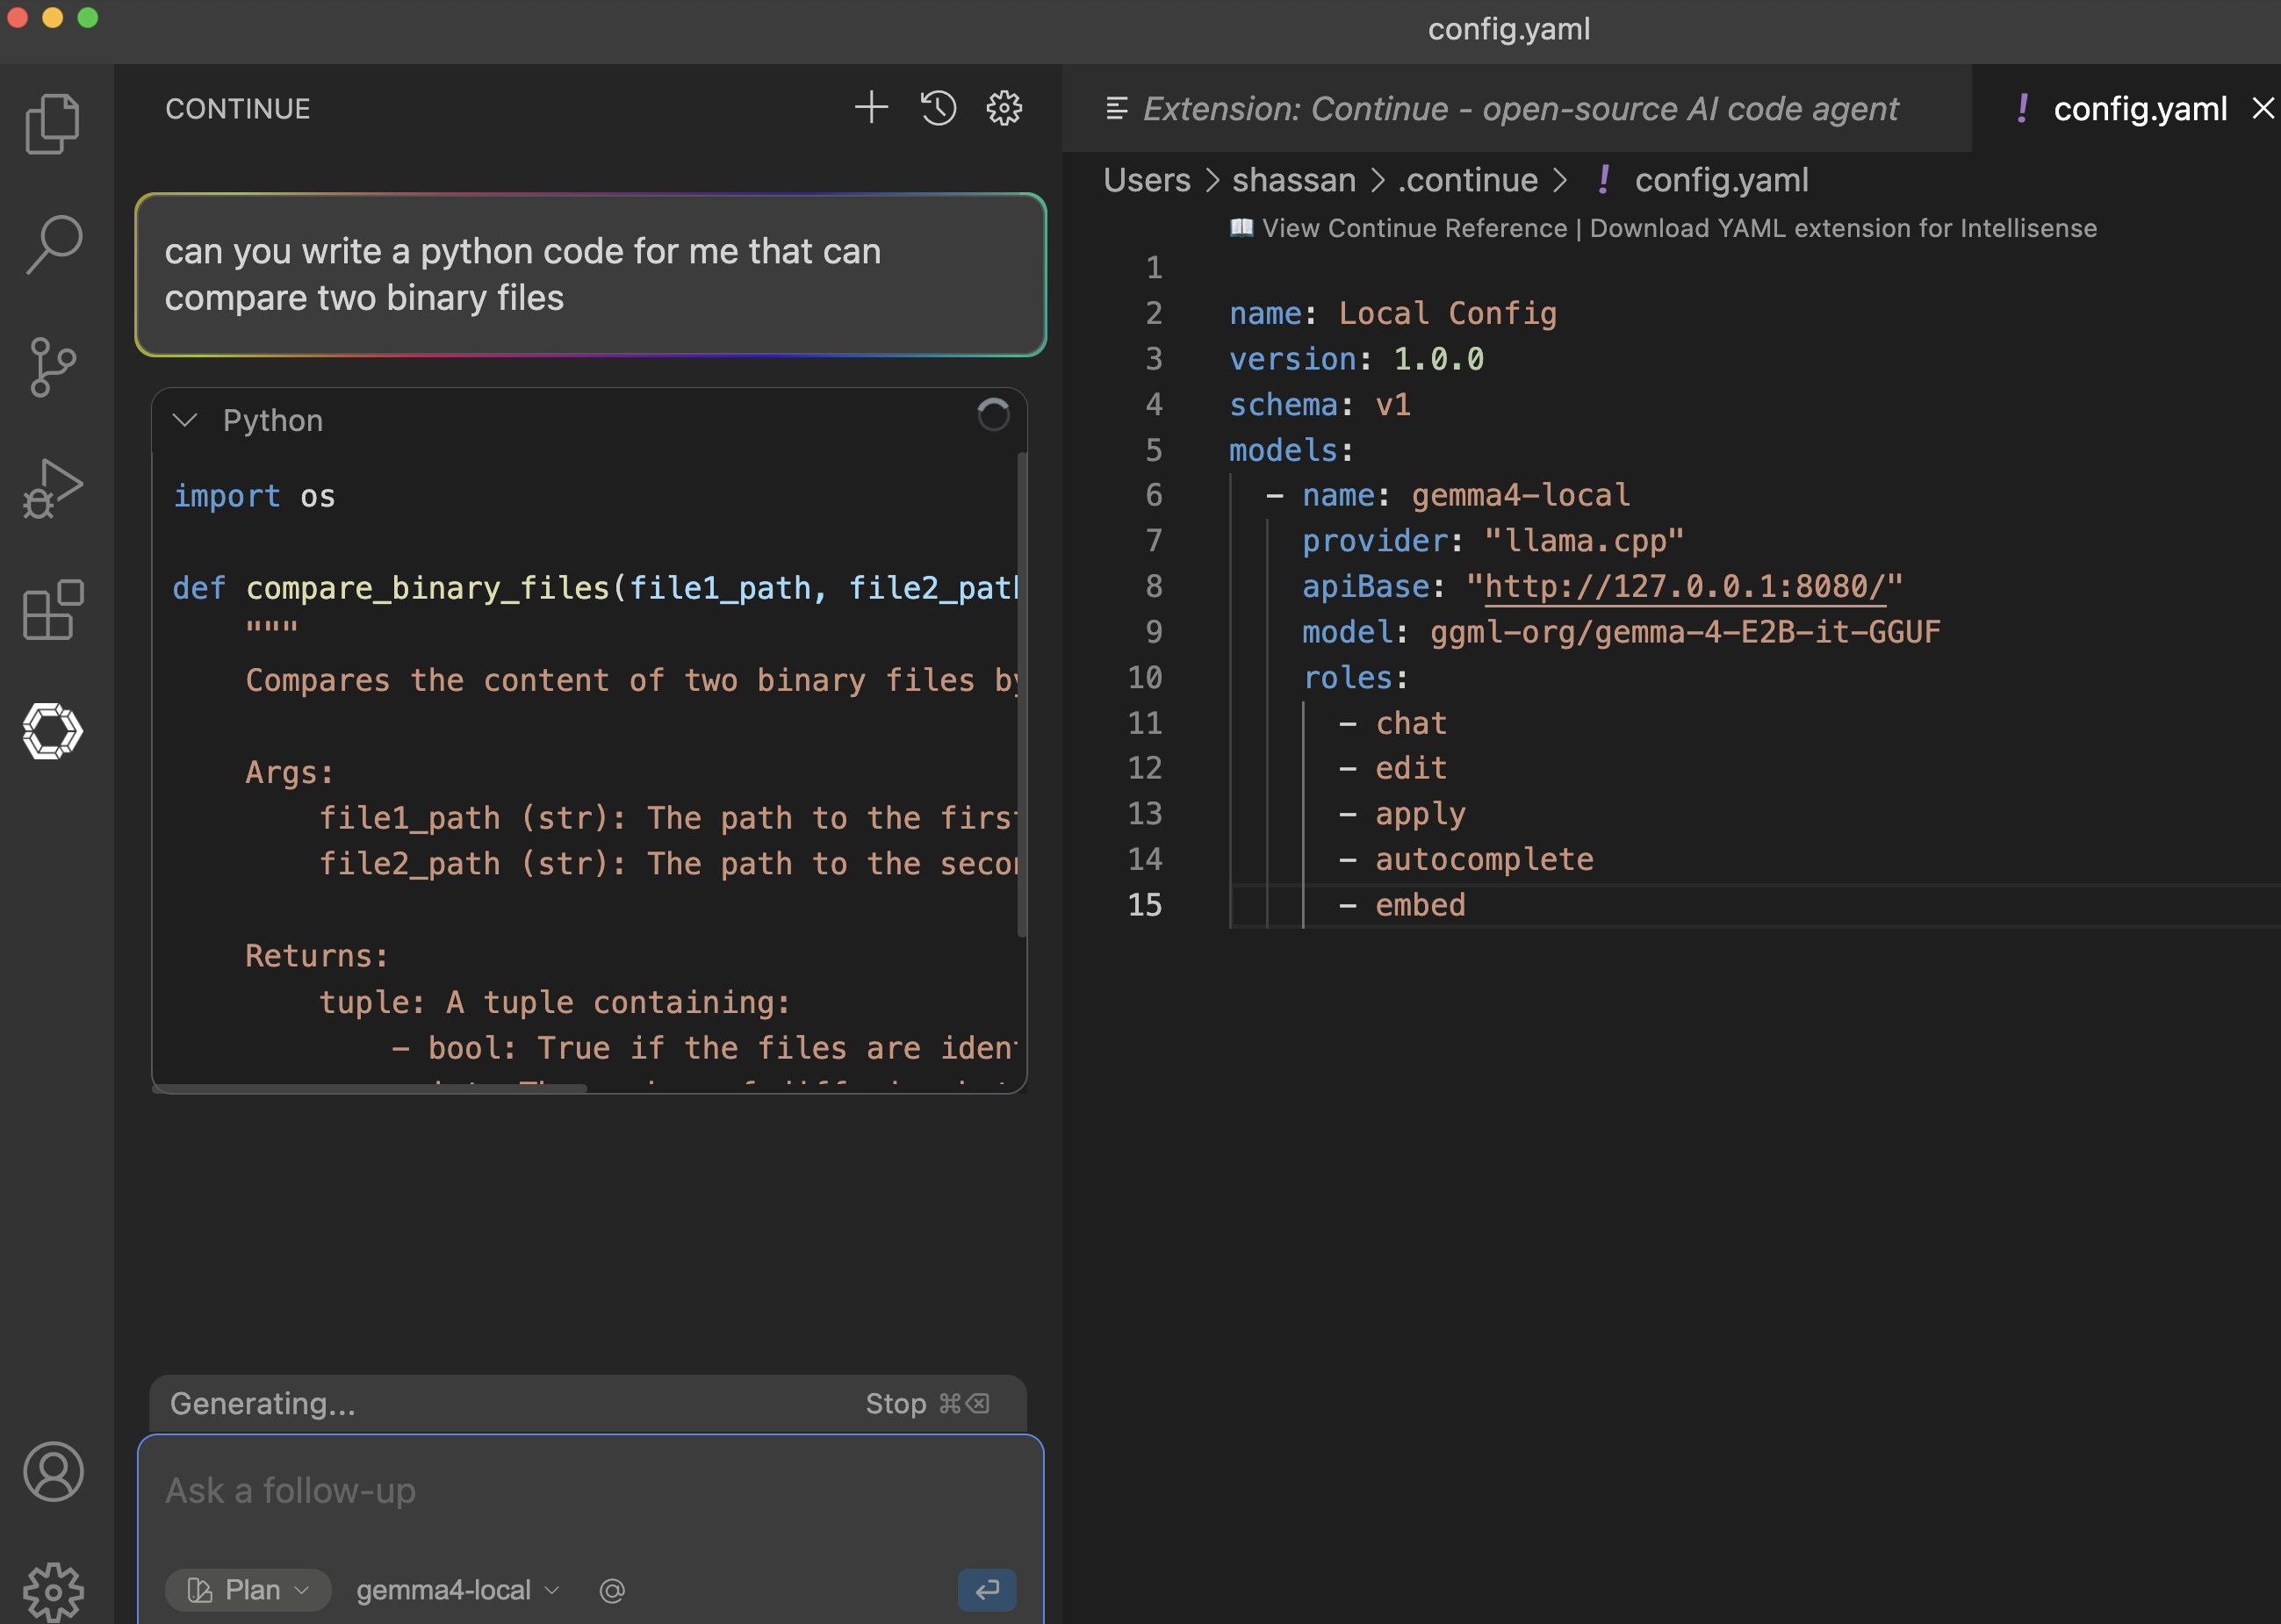
name: Local Config
version: 1.0.0
schema: v1
models:
  - name: gemma4-local
    provider: "llama.cpp"
    apiBase: "http://127.0.0.1:8080/"
    model: ggml-org/gemma-4-E2B-it-GGUF
    roles:
      - chat
      - edit
      - apply
      - autocomplete
      - embed
Step#4: Using "Continue"
Now that you have everything setup, you can go "back" to the "contine" pane (exit the setting pane by clicking on the "back" button) and then start typing what you would like it to do for you. You can choose between Chat/Plan/Agent mode, and you can apply the config it generates for you. An example is shown here:
"Continue" offers use of advanced features such as a using an MCP server, or Auto-compelete etc. This blog, however, was meant to just get you started... for those specific configuration, please refer to the "Continue" documentation page